Brennan, Steve, Rob and Me
Ok…I know I promised blog posts every night. That was a first time attendee mistake. Live and learn. This will be the precursor to a longer more detailed blog post about an amazing week at Cisco Live. No blog post will ever do justice to the incredible time that I had. I met so many new people, established life long relationships, and learned a ton.
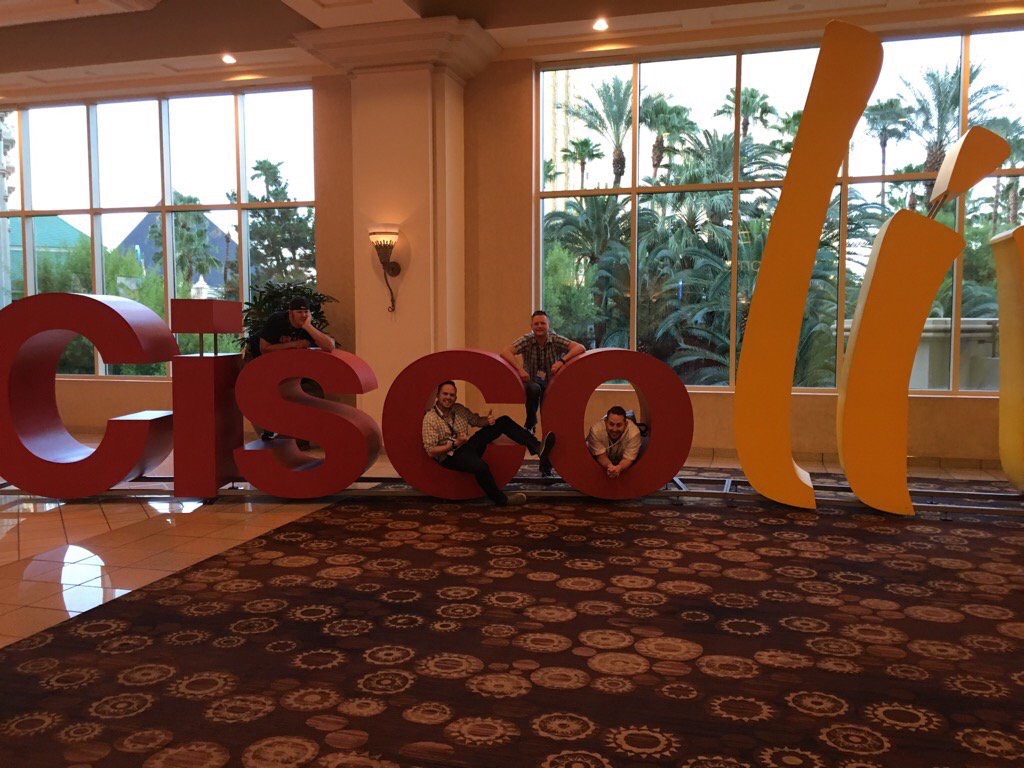
Hanging with Canadians is not good for your criminal record – Steve, Stew, Brennan, and me
My apologies to my non-NerdHerd Twitter following friends and family who had to endure a week of weird posts crushing your feed. Anyway, I have been working on a list of the crazy awesome things that happened to me this past week and plan on formulating a blog post in the very near future.
Safe travels to all my Cisco Live buds out there!
– #MeruMitch
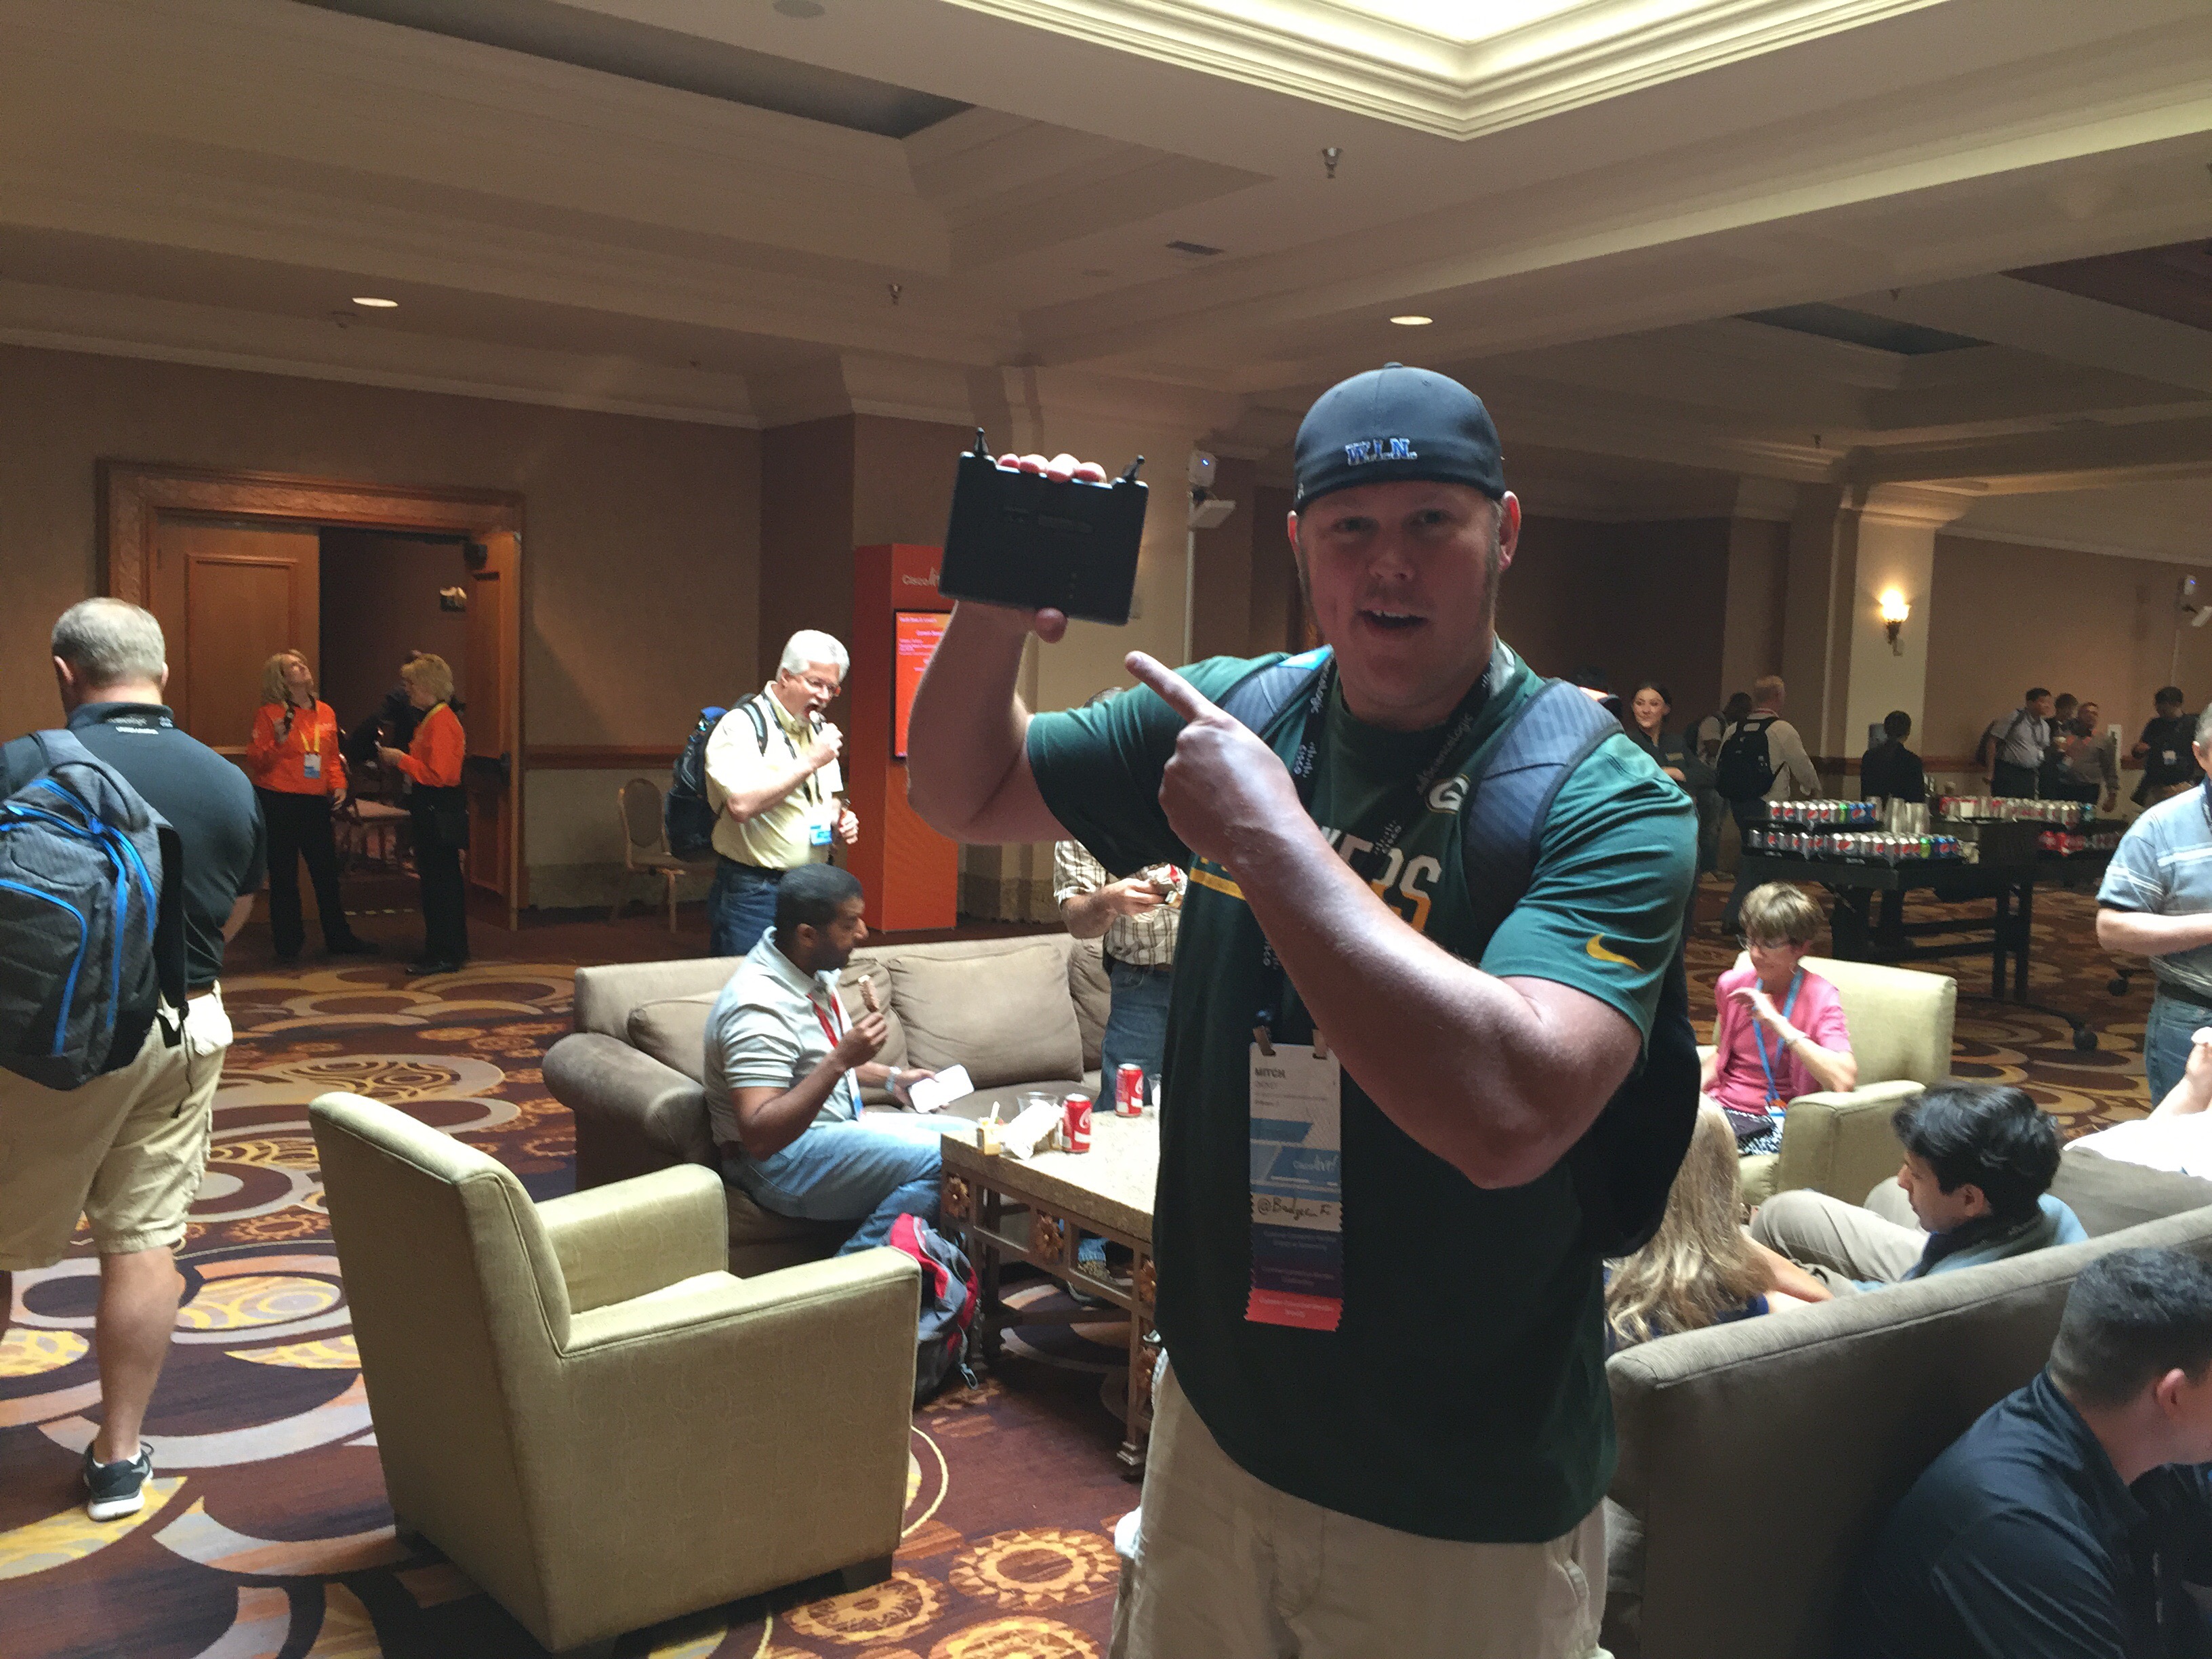
Fred Niehaus signed and gave me a Cisco Aironet 350
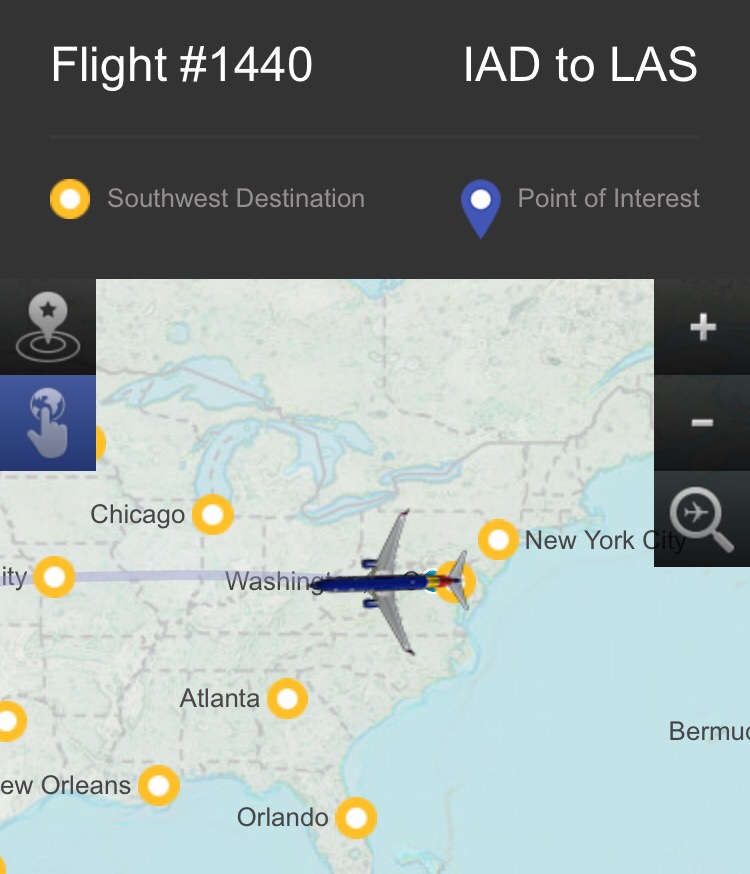
Well, I’m in the air on my way to Cisco Live right now. First thing I had to do was check out that in flight Fi. We will call it “usable” but it should be noted that the signal is great! I am looking forward to meeting a lot of you who I’ve only talked with via the interwebs and taking in some first class sessions. If you feel so inclined get in touch with @rowelldionicio and ask to join his #ciscolive-2016 Slack group. A few of us have already been planning some meet ups and “stuff” there.
I am going to try to post daily and give updates of my adventures at Cisco Live. Hope to meet a bunch of ya’ll face to face!
It is just over a month until I leave for Las Vegas to attend my first Cisco Live. I am really excited to be able to attend this year. When I began my Cisco journey about 10 years ago I had no idea that I would be afforded the opportunity to attend Cisco Live so soon. I have to admit it has been a little overwhelming trying to figure out which sessions to attend, planning which Cisco Exam to take, and looking through everything else the event has to offer. Here is the way my session schedule shakes out right now:
Of course, being a wifi guy, I signed up for mostly RF related sessions. I had a little help choosing from my buddy Sam Clements . Another resource I used was Scott McDermott’s “Guide To Cisco Live” blog post. This is a must read for any first timer. I found that reaching out to veteran attendees and reading up on what to expect is extremely helpful.
One thing I am looking forward to is meeting other people from the wireless network community that I have been corresponding with for several years. I have only had the opportunity to meet a few of you in person so I am hoping to add to the list when I get to Cisco Live. I made sure to leave space in my calendar for moving around the event and socializing.
The following post was inspired by my dude Lee Badman (aka @wirednot, aka Beef Wellington). He is a very talented writer and WLAN professional among other things. If you don’t currently follow him on Twitter or read his work, I highly recommend following him and checking out his blog. His contribution to the wireless community is invaluable but one of his greatest contributions is his daily #WIFIQ. Search out the hashtag everyday and join the conversation.
Back on April 1st Mr. Wellington posted the following #WIFIQ:
#WIFIQ 4/1/16 How often do u sell, config or use WIPS or the likes of CleanAir, 7signal, NetBeez or other performance overlays or sensors?
This particular #WIFIQ stirred my interest differently than what was intended. I have already been familiarized with Cisco CleanAir and 7Signal’s offering but I hadn’t heard of this new “thing” that went by the name NetBeez. I surfed on over to the NetBeez site and read up on their product. What I found was the answer to one of my needs as a Network Engineer. Even better, I had almost everything to get NetBeez running already! If you already own a Raspberry Pi you can have a NetBeez agent running in very short order. The instructions are located here. This will only get you set up to run with your agent connected to Ethernet. As a Wireless Network Engineer I wanted more! I reached out to NetBeez to find out how I could get my agent to do wireless monitoring. Panos Vouzis, one of the co-founders at NetBeez, got back in touch with me a short time later and filled me in with the remaining information that I needed. It turns out that the wireless feature is only available in the paid version. Panos made an image available to me for my Pi and let me know which wifi adapter was needed. The NetBeez agent has only been tested and verified to work with the Asus Dual Band Wireless-N USB adapter (USB-N53). When I purchased the adapter it was $40. For some reason, at the time of this post, Amazon has it for significantly more. While I waited for my USB-N53 to arrive I was able to get the special NetBeez image loaded and running with the help of Panos. Everything was working great already even without the wireless adapter. A few days passed and my adapter finally showed up. The drivers are already built in so the only thing that needed to be done was to add a wireless profile for the wireless networks that my agent would connect to.
NetBeez Wireless Profile configuration page
Now that I had my wireless profiles configured I could verify that my agent was connected to the wifi.
NetBeez agent connection info
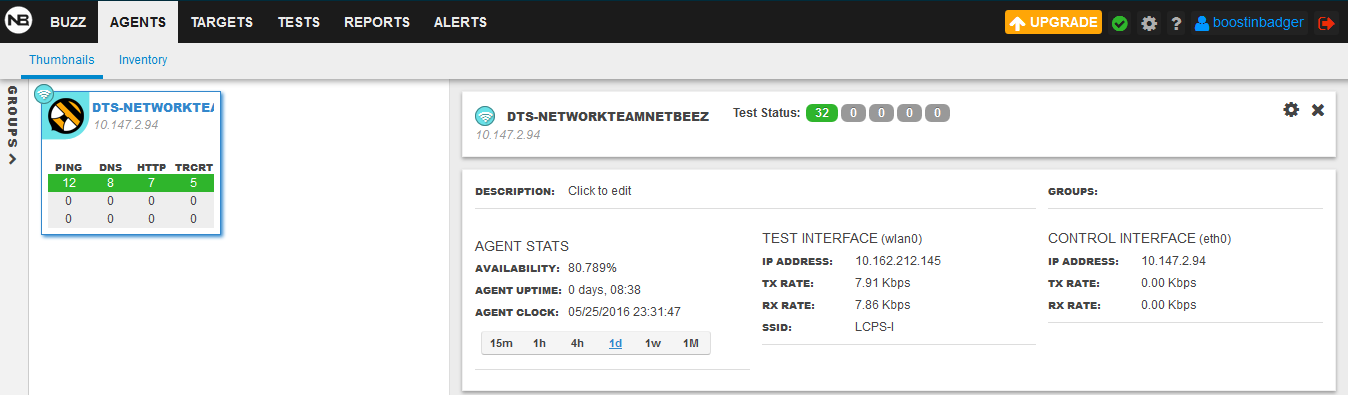
As you can see above I was able to obtain an IP address via DHCP and you can see my TX/RX rate and SSID that I am connected to. A little bit further down on the same page gives you more information on your connection.
NetBeez agent connection info
Now comes the good stuff…adding targets! Targets are the actual tests that you want your agent to run. There are limitations to the free version here as well. The free version only grants you access to create three targets. Panos graciously gave me unlimited target creation for my evaluation. I did find out the hard way that you can go overboard with targets. I created over 100 at one point and I could not keep my agent online. I trimmed down my targets to a much more reasonable number and my agent became stable again. Thanks to Stefano Gridelli for helping me with this situation. We were able to quickly determine the problem and get my agent back online. I added a few targets that I deemed important for testing and reporting in my enironment.
NetBeez targets
Configuring actual targets are extremely easy. Clicking on the plus sign brings you to a page where you specify what you want your target to do.
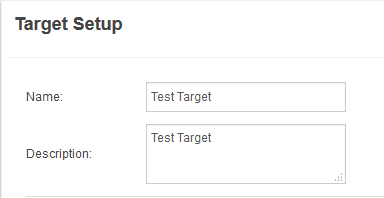
Name your target
Configure your resources
Once you have given your target a name and added resources you need to assign the target to your agent.
Assign target to agent
You can also specify an email address here so your agent can send an alert if your target reaches a warning or down state.
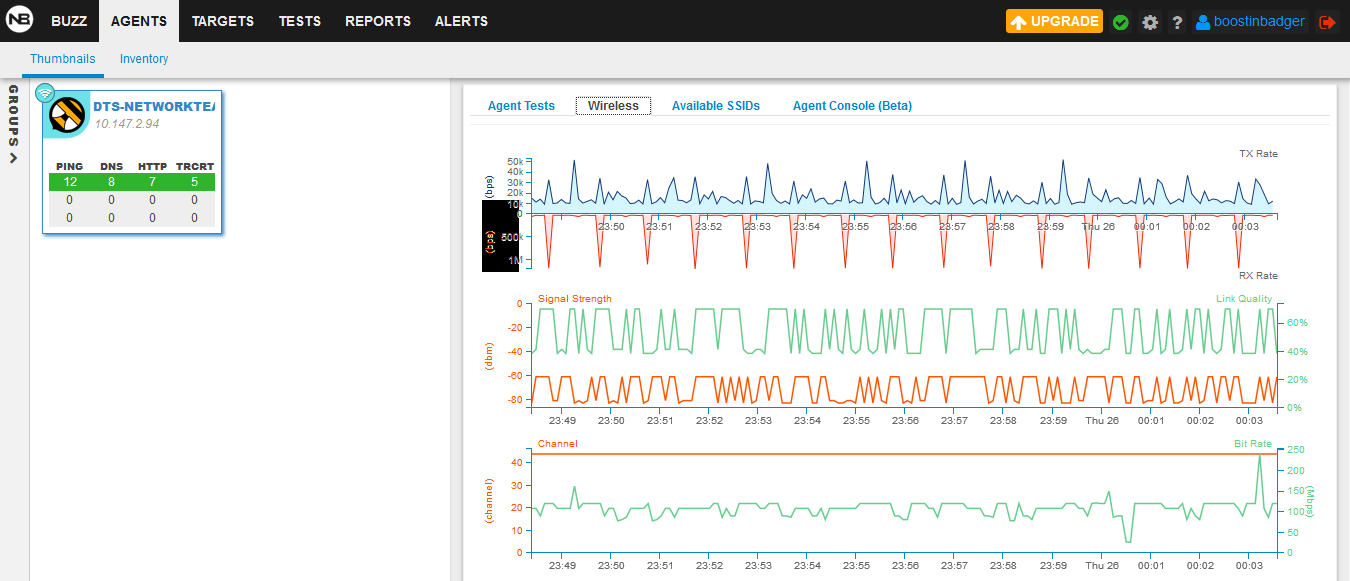
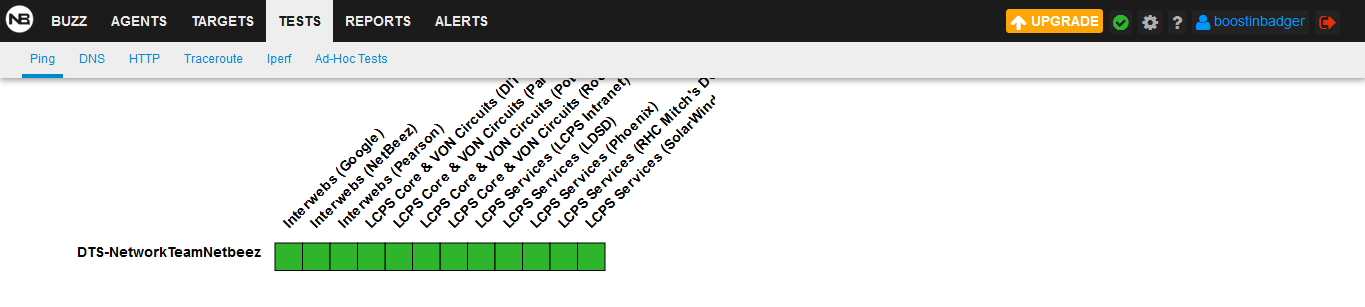
At this point, you are in business! Deploy your agent and start monitoring. After deployment you can actively monitor your agent via the web console and even run reports.
Wireless statsAgent testsPing tests
I have used my NetBeez agent in several circumstances so far and it has worked great! As I type my Beez is deployed in a spot where we are currently collaborating with other teams in our enterprise to determine the cause of a problem.
NetBeez deployed in an active troubleshooting environment
A huge thanks go out to the NetBeez team, especially Panos and Stefano. They were very accommodating to my requests and ready to help whenever I needed it. If you are in the market for a distributed network monitoring device in a small/portable package, please visit their site and consider their product. NetBeez is easy to carry around and deploys quickly.
What I am about to write about is nothing new. Some of my wifi peers have written about Chanalyzer and Cisco CleanAir or various aspects of each or both before. I am going to take you through my journey to get a lightweight Cisco 3502i converted back to autonomous code and connected to MetaGeek’s Chanalyzer.
I suppose I should fill you on what my intent is with this project so you don’t have to wonder why I am going about it the way that I am. I currently use MetaGeek’s Wi-Spy DBx with Chanalyzer on a regular basis and it does everything I need it to do. When I found out I could get an even higher resolution layer 1 view with a Cisco AP that supports CleanAir, I had to give it a try. This was done with no other reason than “just because.”
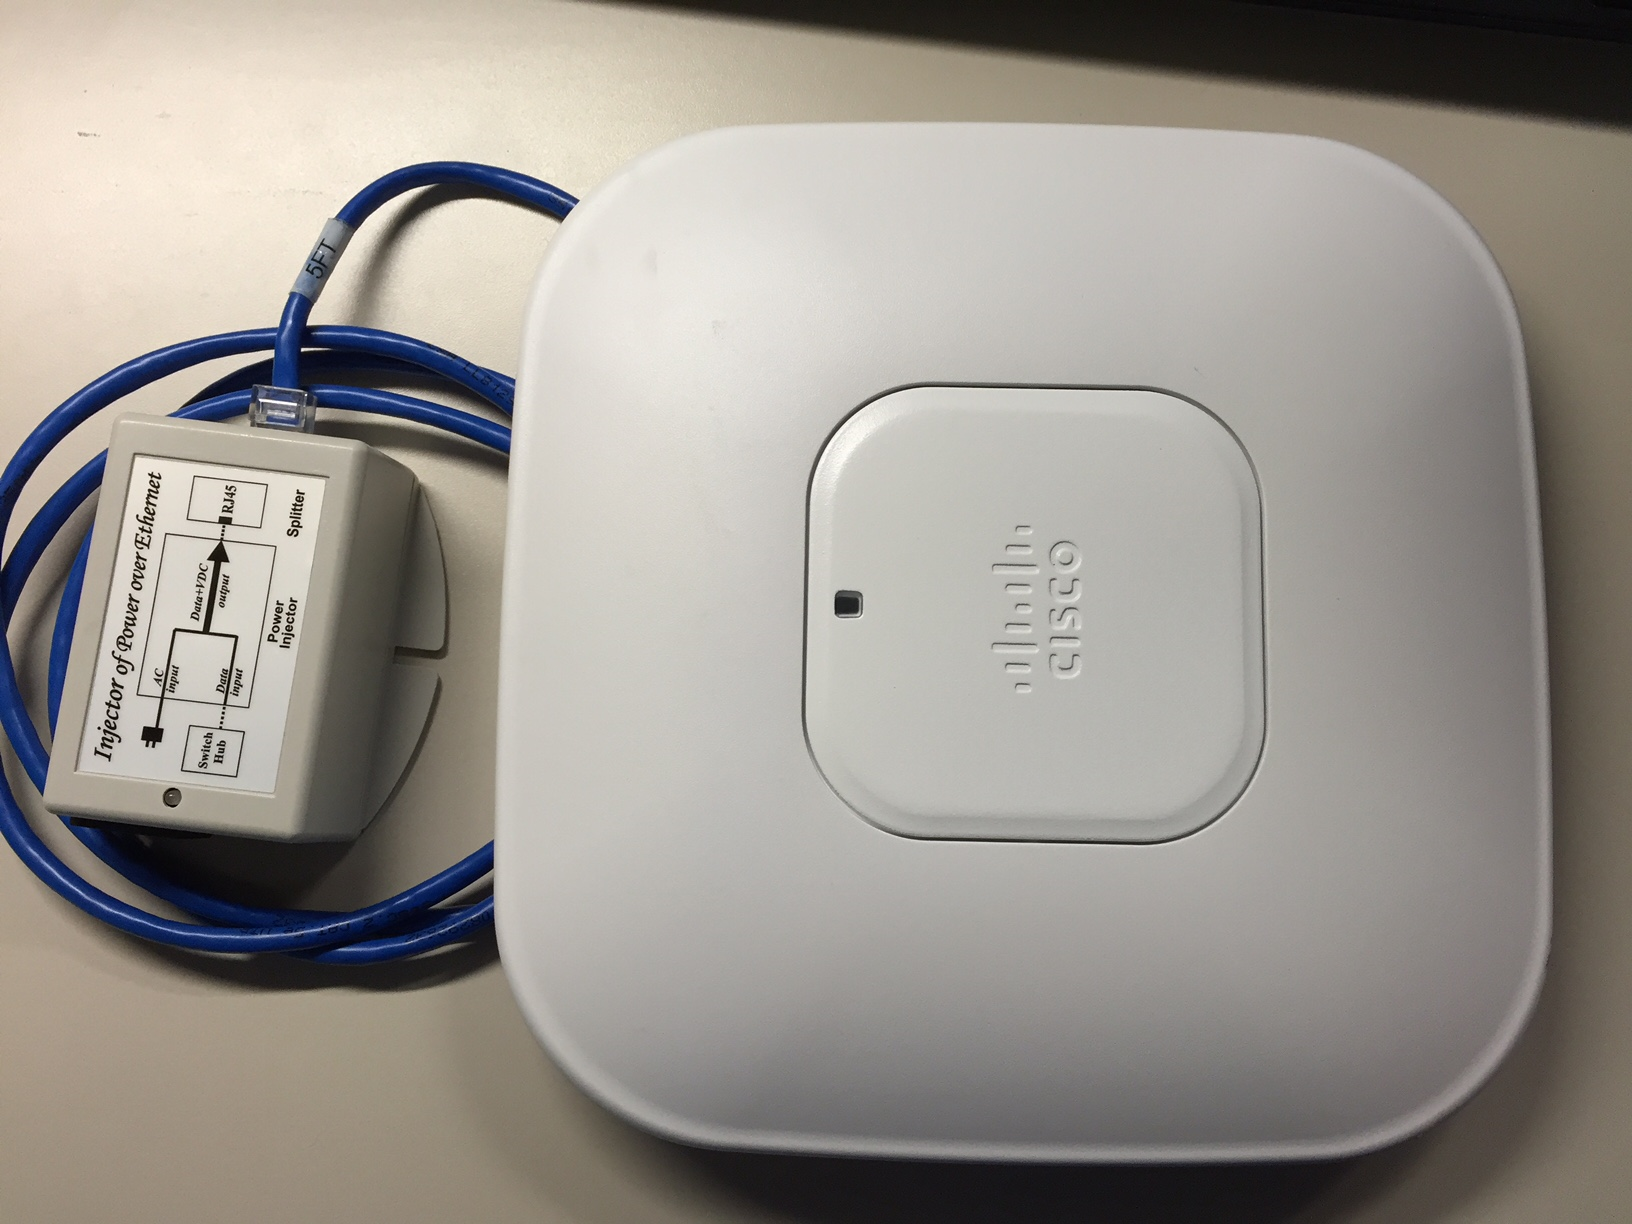
Cisco 3502i with CleanAir
You might say that the DBx is my “go to” tool when I first arrive onsite to check out an issue. I love MetaGeek because their products are excellent and their staff are top notch. Whether you are working with inSSIDer, EyePA, or Chanalyzer, you are always dealing with quality. If you ever need help with any of them my buddy Joel Crane is ALWAYS there to help.
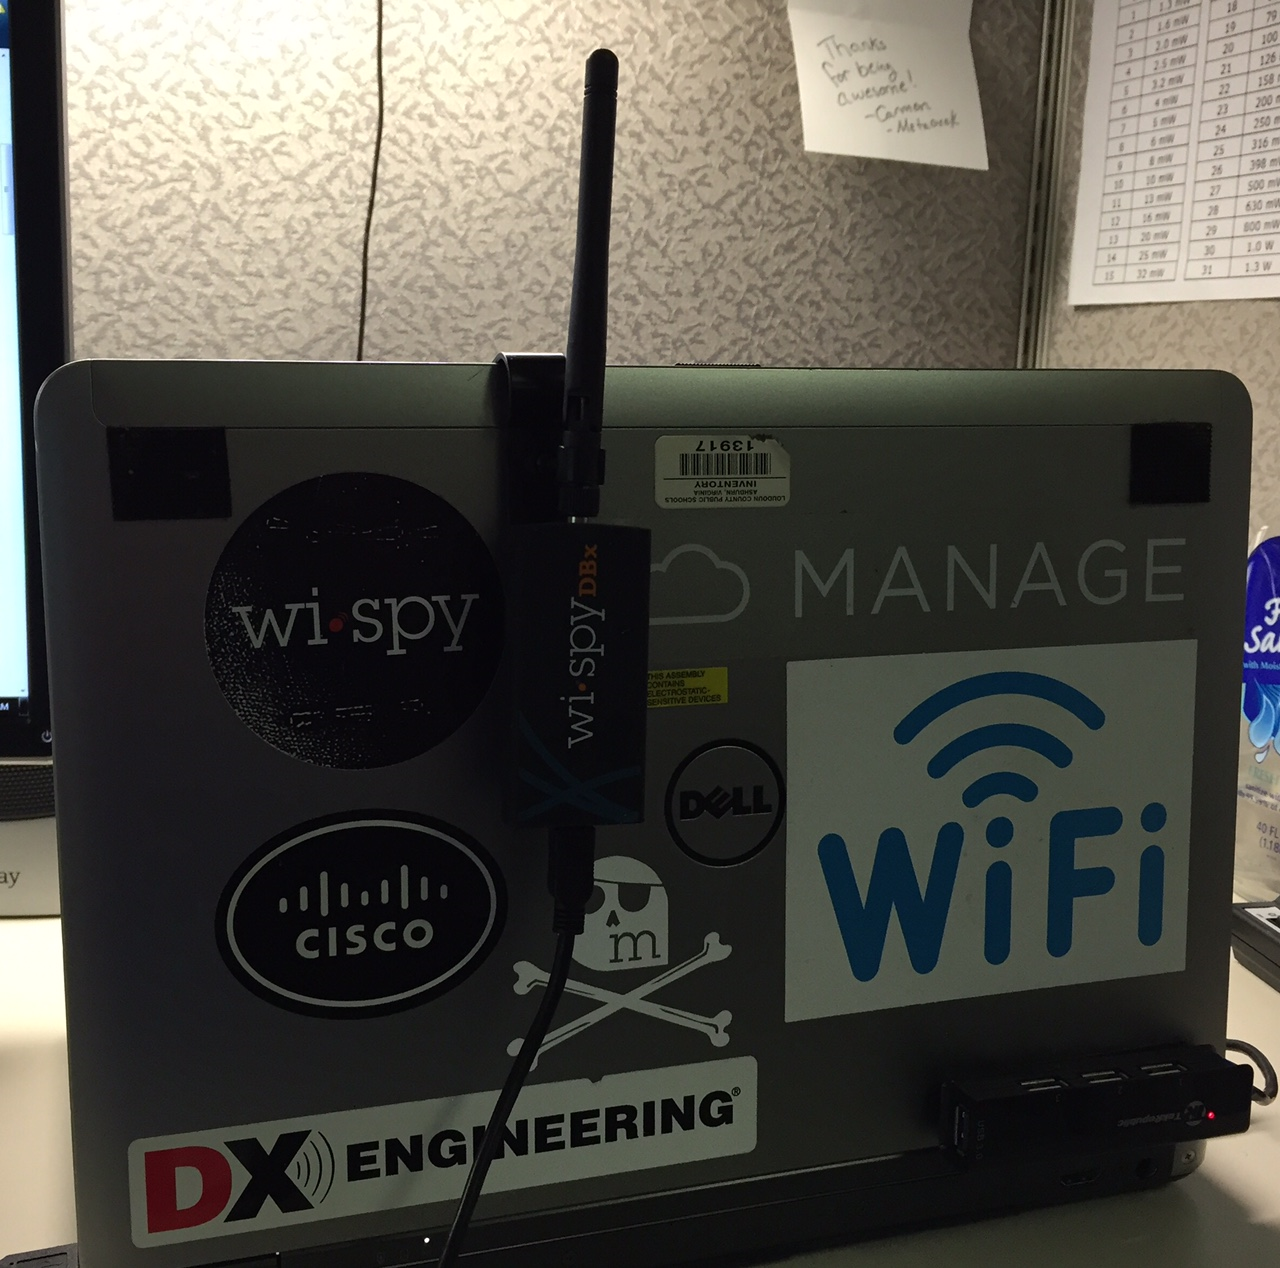
My work laptop with Wi-Spy DBx
The first part of the project began with talking to Sam Clements. He is my go to guy when it comes to Cisco wifi. He gave me some pointers and even hooked me up with ANOTHER 3502i for this project. Sam had previously hooked me up with two other 3502i APs because he felt bad for me and my single 1131 connected to my Cisco WLC 2504. When the 3502i arrived I put Sam’s advice into action. I connected the lightweight 3502i to my WLC 2504 to get it’s code upgraded to 8.2.100.0. Upon completion I took my nice fresh copy of autonomous AP code (ap3g1-k9w7-tar.153-3) and loaded it to the 3502i. I SSH’ed into the WLC and issued the following command:
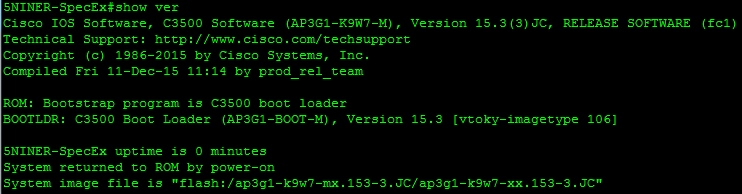
Where [IP] is your TFTP server IP and [AP_NAME] is the name of the AP in the WLCThe process took a few minutes and the AP rebooted a couple of times. Everything is straight forward at this point and you can watch the progress of the “downgrade” via your console output if you have consoled into the AP. Once the process is complete you will recognize that the AP has good ol’ IOS running on it.
CLI output of ‘show version’ on autonomous AP 3502i
At this point most of the heavy lifting has been done. At the advice of Sam, I configured the BVI with an IP address and created a DHCP pool. This was done to allow for easy connection to the AP via Ethernet cable and POE injector directly from my laptop.
Configuring BVI1 with an IP addressConfiguring DHCP pool
For my particular application I chose to use a POE injector to power my AP. I do not have a survey rig battery and I needed something a little more portable. If you do have a survey rig battery you should check out this blog post from Nolan Herring: https://nolanwifi.com/2016/04/22/spectrum-box/. He has built something called a Spectrum Box, also with the help of Sam (that Sam guy is all over the place).
Now that you have connectivity between your laptop and AP you have to tell the radios in the 3502i that they need to be evaluating the spectrum and not serving up wifi. This mode is also known as SE-Connect mode.
Configuring the 2.4 GHz radio for spectrum analysisConfiguring the 5 GHz radio for spectrum analysis
The AP is now fully configured for use with Chanalyzer. At this point I was super excited but I was soon met with disappointment. I had failed to realize previously that connecting to a CleanAir AP with Chanalyzer was an additional feature that would require a purchase. I quickly got in touch with Joel at MetaGeek and let him know of my predicament. He graciously provided me with a key enabling the CleanAir feature so that I could continue my project. A big thank you goes out to Joel and MetaGeek for providing me with this feature so that my project did not come to a screeching halt.
We are now at the point where we can open our trusty ol’ Chanalyzer. This is where everything that us DBx folk are used to, will change. Once you have Chanalyzer open you will notice there is a menu named CleanAir (as long as you have purchased this feature). When you click on CleanAir it will prompt you with some options. If this is your first time connecting to a CleanAir AP you should select “Connect to a CleanAir AP.” You will then be prompted with a box that looks like this:
Connect to CleanAir AP box
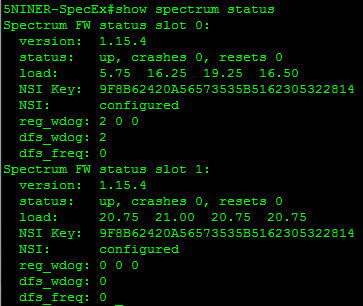
Enter the AP’s IP address (in my case it is the default gateway given to me by the DHCP services on the AP), enter the NSI key, and enter a friendly name. You might be asking yourself what an NSI key is, much like I was. It is a unique code that is used like a password so that Chanalyzer can connect to a CleanAir AP. You can get the NSI key from the AP by issuing the following command from the CLI:
CLI output of ‘show spectrum status’
You’re In!!! At this point you are ready to check out the detail that the Cognio chipset has to offer inside of a Cisco CleanAir AP!
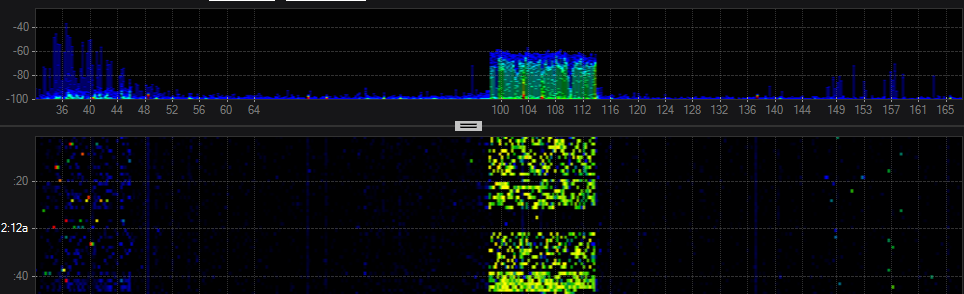
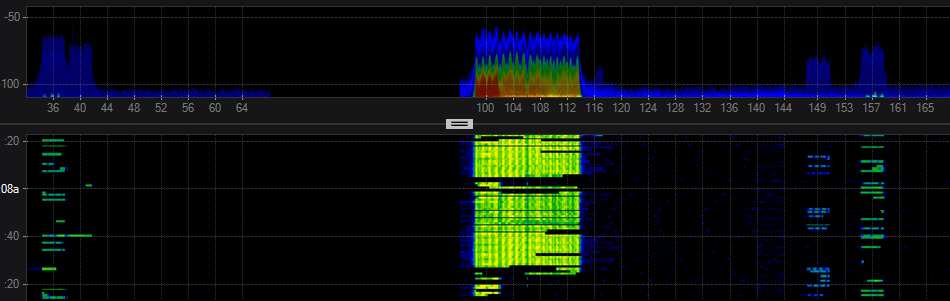
Chanalyzer with DBxChanalyzer with CleanAir AP
As you can see the resolution of the Cisco CleanAir AP with the Cognio chipset is very clear. Each mode definitely serves it’s purpose though. The DBx will still be my go to tool in the field but the clarity of the CleanAir AP is hard to beat. If you already have CleanAir APs in service this could be a much more practical remote monitoring solution for you. It should be noted that there are several other use cases\situations that this could be deployed for.
If you don’t have the CleanAir capability with Chanalyzer and you currently have Cisco CleanAir APs, do yourself a favor and visit MetaGeek’s website and purchase the accessory. You definitely won’t be disappointed!
Here is a few blog posts that I read through while completing the project:
It has been brought to my attention that I may have posted some incorrect information. Thanks to both Andrew von Nagy and Jason Hintersteiner for raising the question of whether or not .11r is enabled by default. After thinking more about this, I realized that this would in fact be a weird default setting. After further research and some quick labbing, I determined that I did post incorrect information. 802.11r is NOT enabled by default on PSK networks on the Cisco WLC or the Meraki dashboard. I have updated my previous post with an EDIT but left the original information posted.
Thanks to Andrew von Nagy and Jason Hintersteiner for bringing this to my attention. The 802.11r (FT) default setting in both the Meraki dashboard and Cisco WLC is in fact set to DISABLED. I don’t recall changing this setting, but I must have. My apologies.
***************
At my house I have many duties. I am husband, father, plumber, carpenter, lawn mower, wood-cutter/splitter, etc. The list is long and I enjoy every one of them (most of the time). I am also the CIO. We don’t have a sophisticated ticket system for entering technology problems, but we do have a sophisticated alert system named “Ella.” This system has been online since August 2011 and is very good at letting me know when the “wifi is not working” or the “internet is down.” Ella is my daughter. When Netflix comes to a screeching halt I know of the problem in very short order and there is very little tolerance for downtime. Of course most issues that the end users experience at home (much the same at work) look like a wifi problem but a lot of times are not. Most issues can easily be solved by cycling the power on either the WatchGuard Firewall running pfSense or the cable modem. I have an assistant that I have trained to handle such tasks when I am not around. His name is William and he is my nine-year old son. He used to be a reliable network monitoring system like his sister but sports have replaced technology for the time being.
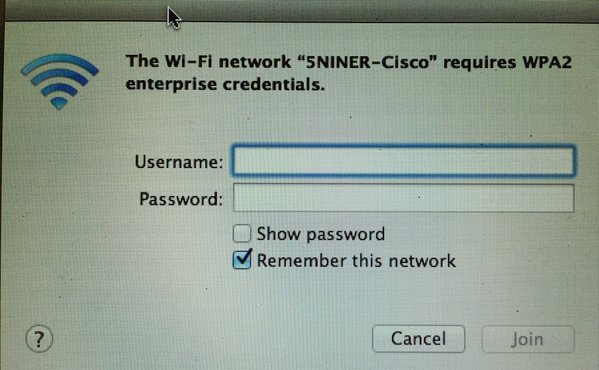
This brings me to a recent issue that we experienced on the home front. It WAS a wifi issue…kinda. My wife brought me her work issued MacBook Air which would not connect and was asking for WPA2 Enterprise credentials. The MBA was one of the first and hasn’t been updated in a very long time (OS X 10.8). It should be noted that I offer up three different flavors of wifi at the house; Cisco, Meru, and Meraki. Each iteration offers one SSID of which her MBA would not connect to any. Each SSID uses the same WPA2-PSK passphrase and runs the most current version of code on the back-end. Of course my wife made it very clear to me that “it works just fine at work” in her classroom (also Meru). All other devices were working fine including both of our iPhones and my Dell with Intel 7260. I mulled it over for a few minutes but could not figure out why her MBA continuously asked for WPA2 Enterprise credentials on all of my SSIDs. A quick Google search didn’t reveal anything obvious and a station log remained empty on the Meru controller. The only thing that stood out in my mind was that I recently updated my Meru controller and turned on all the latest bells and whistles. She had only ever been connected to the Meru SSID so I started there. I created a very generic SSID named affectionately “ForYourDumbMac” and configured it very similar to the others but left most settings default; all legacy rates enabled, same WPA2-PSK passphrase, etc. The MBA connected to the new SSID on the first try! I started flipping switches on “ForYourDumbMac” one by one until the MBA would no longer connect and I was prompted for WPA2 Enterprise credentials. Lo and behold the last switch that was flipped before the MBA stopped working was to enable 802.11r (Fast BSS Transition). I toggled 802.11r back off and the MBA happily connected again. For those of you not in the know, 802.11r allows for a more speedy transition while roaming between APs. This is of course a very basic explanation and a more detailed explanation of 802.11r can be found in this CWNP whitepaper written by Devin Akin: https://www.cwnp.com/uploads/802-11_rsn_ft.pdf .
Courtesy of https://supportforums.cisco.com/sites/default/files/media/802.11r_support.png
Once I was able to determine that 802.11r was causing the issue I turned it off (which is the default setting) on the original Meru SSID and the MBA connected right away. Further research turned up a chart (right) that showed 802.11r was first supported in OS X Yosemite 10.10.
EDIT – The following sentence is incorrect. The default setting for 802.11r is DISABLED.
I checked both the Cisco controller and Meraki dashboard and they both had 802.11r (FT) enabled by default for PSK SSIDs but not 802.1x SSIDs.
Cisco 2504 WLC running 8.2.100.0Meraki Dashboard running latest firmware as of 05/02/2016
So I had to do the one thing that I hate to do. I had to tailor\dumb-down the entire network (albeit my small home network) to support a single client. But you know the saying, “happy wife…happy life.”
Yup…I’m that guy. The “I like my SCA, MCA’ed” guy. Sometimes I feel like I am the only one that lives on the “single channel architecture” island. It took quite some time to actually admit to my wifi peers that I used and liked Meru wireless. I am, however, vendor neutral. I LOVE all wifi! More on that later…
As this is my first venture into blogging, I guess I should introduce myself even though 90% of you who are reading this know me through the wifi community. My name is Mitch Dickey. I am originally from Wisconsin (the whole badger thing), but have lived in Virginia since 1993. I started into the IT industry after I graduated from Bridgewater College (VA) in 2003. I scored my first job with the school district that I had graduated from four years previous. I had participated in the cooperative education program while in high school and completed an internship prior to my graduation from college with that district. Having established many good relationships before I was hired allowed me to be blessed with a job upon my graduation. After a few years I decided to set some goals for myself as I was getting bored turning screwdrivers and babysitting servers (no offense to those who do these critical jobs, it just wasn’t for me anymore). I decided to get into networking but more specifically Cisco networking. I attended classes, read, studied, purchased older equipment to lab with, and watched training videos, etc, all on my own time. It took a couple of years (you know…just married, kids, buying a house) to get to my first goal but I attained my CCENT. I began to search for other opportunities that would allow me to grow and achieve my next goal, becoming a Network Engineer. I was able to find a position in 2011 that would allow me to take that next step and grow even more. Shortly after taking a position with a VAR, I was asked what my interests where and we both decided that the wifi route would be beneficial for both of us. I completed my CCNA and started down the wifi path. I have always been interested in RF in general but when I was given the opportunity to take CWNA training, I fell in love. Since that CWNA class back in 2012, I cannot get enough wifi! Although the VAR I worked for primarily sold Meru, I tried to get my hands on as much wifi equipment as I could. Shortly thereafter I took the CWNA exam and passed. While working at the VAR, I was responsible for other aspects of IT so I was not able to completely focus 100% on wireless. On my own time, again, I began studying for the CCNA-W. I purchased some used equipment and set it up at my house. I was able to prepare with the limited resources I had and I passed the CCNA-W exam! I was accomplishing my goals at a very quick pace! It was now time to start working towards my next goal; becoming a Network Engineer in an enterprise class environment. I wasn’t really looking but an opportunity presented itself in 2014. Not only was it at a K12 (where I loved working previously), but it was a Senior Network Engineering position at a very large K12 where I would be responsible for just the network, primarily wifi! I was back working with a team and on the equipment I love. Perfect! I started with LCPS in 2014. I completed my CWAP last year and am currently working on my CCNP-SWITCH. I have my eyes set on the CWNE.
A little about my day to day right now. We currently maintain just under 100 sites with just over 5500 access points. At peak usage during the day we typically average 48,000 wireless devices. A recent report showed that we touched 113,000 unique devices in a 24 hour period. We are very proud of what we are achieving and the group of guys I work with are awesome.
This seems like a weird spot to do this, especially since this is my first post but I want to take the time to thank people in the wifi community that have helped me get to where I am today. Whether it was with knowledge, tools, gear, etc, without you it would have been very hard to get here. The wifi community is awesome because it re-invests in itself.
Shout out to Keith Parsons, Sam Clements, Devin Akin, Eddie Forero, Zaib Kaleem, the fine people at MetaGeek (especially Joel Crane), Lee Badman, just to name a few. There are many others so please forgive me if I forgot to mention you….THANK YOU!
Oh…and thanks to Henry Stukenborg at that “fruit company” for the subject for my first entry. It was meant to be a name for the blog itself, but I had to stick with the badger theme.
Well, I guess this means I will have to start writing on a regular basis. I know you guys have been wanting me to write for a while. Most of what I will likely write about will be stuff that you already know but I am just going to share what is on my mind…mostly wifi, with a mix of life here and there.
PS: I am still tweaking the layout of the blog. If you see something that needs adjustment please let me know.

 Of course, being a wifi guy, I signed up for mostly RF related sessions. I had a little help choosing from my buddy