The following text is what I read at the school board meeting on 02/13/2023. The portion in red is very important but I ran out time, so it didn’t get read publicly.
We’ve seen it all over town on bumper stickers, we hear it in our community, and we especially hear and see it at Madison sporting events. Madison Pride. We have many reasons to be proud of our community. We have many students that excel scholastically and athletically. The pride for our young people should be shouted from our nearby mountain tops but can we be absolutely confident that we are taking pride in ALL aspects of our school system? Madison Pride should also represent the needs of the people and infrastructure that support our students academically and athletically, too, right? There have been strides in recent years, but there are still many questions that need to be answered.
What are we doing to retain/incentivize/recruit teaching staff that want to commit to MCPS long term?
What are we doing to get staff licensed that are provisional?
What are we doing to retain/incentivize/recruit support staff, such as custodians, bus drivers, cafeteria staff, and information technology?
What are we doing to obtain/maximize grant money?
What are we doing to keep salaries competitive?
What are we doing to improve employee health insurance costs?
What are we doing to catch up salaries of all staff that have remained loyal through frozen budget years?
What are we doing to solve substitute staff shortages?
What are we doing about rising class sizes?
What are we doing to get teaching assistants in classrooms to support our neediest students?
What are we doing to solve the problem with our students not taking care of their Chromebooks which is preventing them from taking them home for their studies?
What are we doing to ensure time for extension/enrichment content for gifted students?
What are we doing to find and fill reading specialist positions at each school?
What are we doing to compensate custodians and non-licensed staff that are coming in on their own time?
What are we doing to make sure there is access to the same technology in all classrooms, and not just certain classrooms?
What are we doing to repair/improve our aging athletic facilities for all student athletes?
What are we doing to prepare our student athletes for college athletics?
What are we doing to support our students that are looking to get into a trade directly after high school?
What are we doing to improve/maintain the working relationship with the BoS so we can address our needs?
What are we doing to hear our staff’s voices? SURVEYS ARE NOT THE ANSWER
Some of these questions are referenced in the Capital Improvement Plan. The plan is over generalized and addresses, mostly, on the surface issues. Are we addressing issues that aren’t in plain sight?
This isn’t to point the finger at any of the staff in our school system. I believe that all our staff, starting at the top with Ms. Graham, do a great job with the resources that they have. I know the easy excuse is to blame funding, and part of the problem may be just that, but what are we doing to fix the funding issue if there is one? We can’t receive a reason for a problem and throw our hands up and leave it. We need to find an answer. We might not get the answer that we want, and that is fine, but we can use that answer to find a solution and move forward.
I do realize there are financial disparities between larger and smaller school districts but are we really doing the best we can to bridge the gap? Are we certain we are focused on fighting the battles that are directly in front of Madison County Public Schools?
Are we truly in tune with the needs of our superintendent and school system right now? Do we know all the struggles that our administrators, support staff, and teachers face every day? Why do our teachers have to go home at night worried and stressed about the next day, instead of feeling a sense of accomplishment? Why do our teachers have to arrive in the morning and do extra cleaning because we can’t retain evening custodial staff?
Until we get our administrators, support staff, and teachers the resources and support they need, can we really be Madison Proud?
I have been a NetBeez fan for several years now. I started my hive with the Raspberry Pi 2 agent and have been using them ever since. Over the last year or so we have upgraded our hive to include the latest and greatest Raspi agent, as well as include KVM and Docker agents hosted within Cisco Catalyst 9300s. The people behind NetBeez are second to none, and their product keeps getting better and better!
I’ve recently had the opportunity to work with the NetBeez folks, as well as some folks from Cisco, on an upcoming webinar where we are going to discuss Cisco’s AppHosting capabilities, combined with Netbeez, on the Catalyst 9k line of switches. Notice I didn’t specifically limit the previous sentence to just the Cat 9300 ;). More to come on that later.
Check out a couple blog posts from Netbeez and Cisco about our upcoming webinar!
We still use the NetBeez hardware agent as our frontline troubleshooting tool when we need to deploy an agent remotely and monitor “network issues.” We are all familiar with those times when we get reports of “network issues” just to find out when we get onsite to troubleshoot, that “the issue went away.” We use the hardware agent a little differently than most. We will leave the hardware agent behind to collect and relay data back to our dashboard so that if the issue returns, we can see the problem first hand, from the client perspective.
Over the last year or so, with the addition of virtual Netbeez agents, we have been able to change the game of monitoring the network. Being able to leverage existing switching infrastructure, specifically the Cisco Catalyst 9300, we are able to deploy Netbeez agents “inside” equipment we already own using Cisco’s AppHosting capabilities!
Combining the power house Cisco Catalyst 9k line of switching with the capabilities of Netbeez has been very rewarding in many ways. Join NetBeez, Cisco, and me on September 10 at 1PM EST to see how we are changing the way we troubleshoot and gather information from the network in dynamic times!
Over the last several months I have had the opportunity to do some writing about some of the cool stuff Aruba Networks has been working on. I wanted to write a quick post which brought all of the content together.
It seems as though things have been changing from day to day (or maybe hour to hour) over the last several months as we figure out ways to navigate a pandemic. Not many things are immune to the affects of the pandemic, no pun intended, and that includes reliable network access. K12 network engineer’s minds have been spinning as school districts grapple to find new ways to provide network access outside of their buildings.
A couple of months ago we were tasked with a project to supply internet-only wifi to selected school parking lots. We came up with a pretty good, low cost solution, that we thought would be an ideal fit. We bought the equipment for a PoC, ran tests, and everything worked very well. We planned on using point-to-multipoint radios; one base radio on top of a school, with one or two CPE radios on light polls in the parking lots. These CPE radios not only provided backhaul to the school network via the base radio on the roof, but they also had a client facing radio that could deliver wifi to devices in the parking lot. When the idea was presented to leadership teams there were valid concerns that we hadn’t thought of. What we didn’t know was most of our parking lot light poles are only energized during certain times and there were concerns about wind loading invalidating light pole warranties. After that idea got scrapped, my supervisor and I had many long conversations about solutions and we finally decided on providing wifi service using LTE backhaul with Cradlepoint routers. It wasn’t the perfect solution but it was quick, reliable, and scalable.
I recalled seeing a solar solution from AccelTex not long ago so I decided to reach out to my ol pal Smitty. Smitty gathered a bunch of requirements from me so that he could tailor a solution to fit our needs. In short order we had a complete solar solution that the Cradlepoint router fit perfectly into! We were very happy with the proposed solution as it was going to quickly meet a need that we had, in a fairly fluid situation.
Smitty and the fine folks at AccelTex were able to get 20 complete solar kits assembled and shipped to us in fairly short order. I was able to have one complete kit shipped to my house (I’m still currently working from home), while the rest were shipped to our office. I received my kit via freight one afternoon and was pleasantly surprised to find the pallet a much more manageable size than I was expecting. I wasn’t sure how many pieces and parts I was going to have to assemble, how much wiring I was going to have to do, and how bulky everything was going to be. This is what I got:
One complete, palletized, kit
Everything was very well packaged and arrived safely. I began the unpacking process so that I could organize the parts for assembly. Although it is a fairly large piece of equipment when assembled, there were surprisingly few parts.
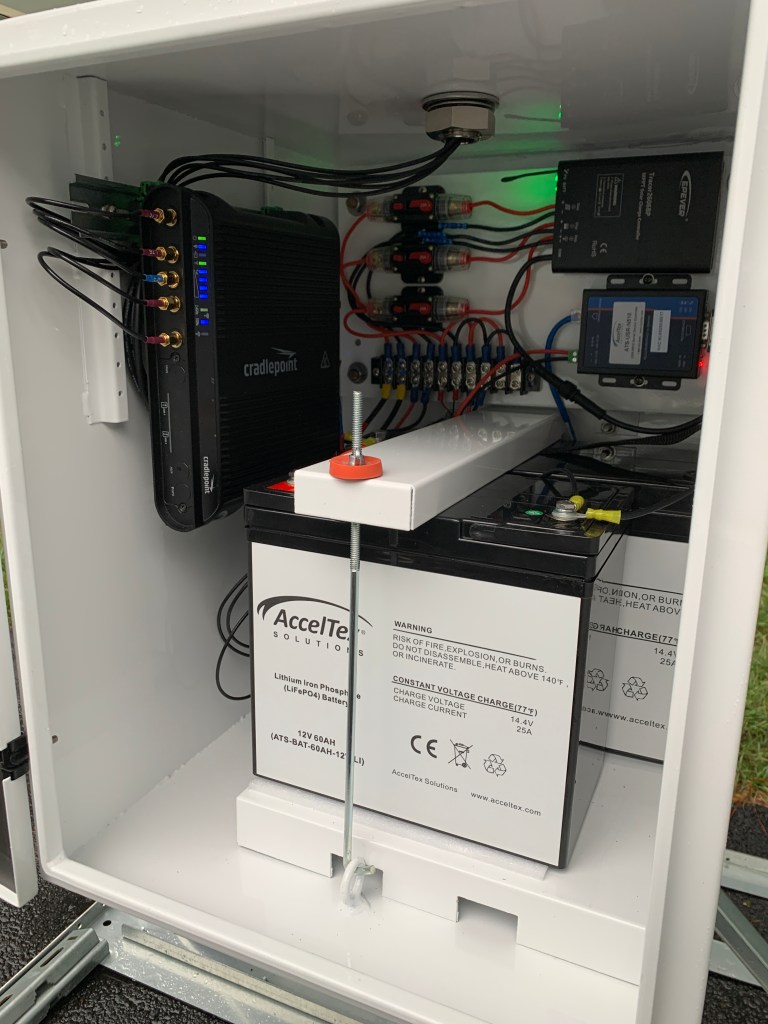
The enclosure, which is the main piece of equipment in the kit, is mostly complete upon arrival. The solar controller, wiring, circuit breakers, LTE antenna, bus bar, and remote monitor are fully assembled within/on the enclosure. To be totally honest, I was a little disappointed that I didn’t have more wiring to do because I enjoy that sort of thing.
Also pictured here is the battery tray and solar panel wiring harness.
Now that I had everything unpacked and organized, I began building the kit. Smitty had emailed me the kit installation documentation prior to the kit’s arrival. The installation documentation is easy to read and thorough. The install documentation is prepared with the purchaser in mind and includes information such as panel degree tilt which is specific to your location. In our case a clear view of the southern sky at a 51 degree tilt was what we needed.
Assembly is definitely made easier by having another set of hands; something I wasn’t lucky enough to have during my assembly, but I made it work.
Enclosure mounted to the mast, all mounted to the sled
Soldering was not required for our kits but I decided to solder the spade connectors to my Cradlepoint router pigtail so that I knew the connection was good. This was one of the few things that I decided to do outside of the installation documentation to make for a better install. As far as the wiring is concerned, the only connections that need to be made to the system are the leads that go to the solar panel and the pigtail that supplies power to the Cradlepoint router. The bus bar has two additional locations for 12v equipment if you have the need.
Batteries installed and wiring complete
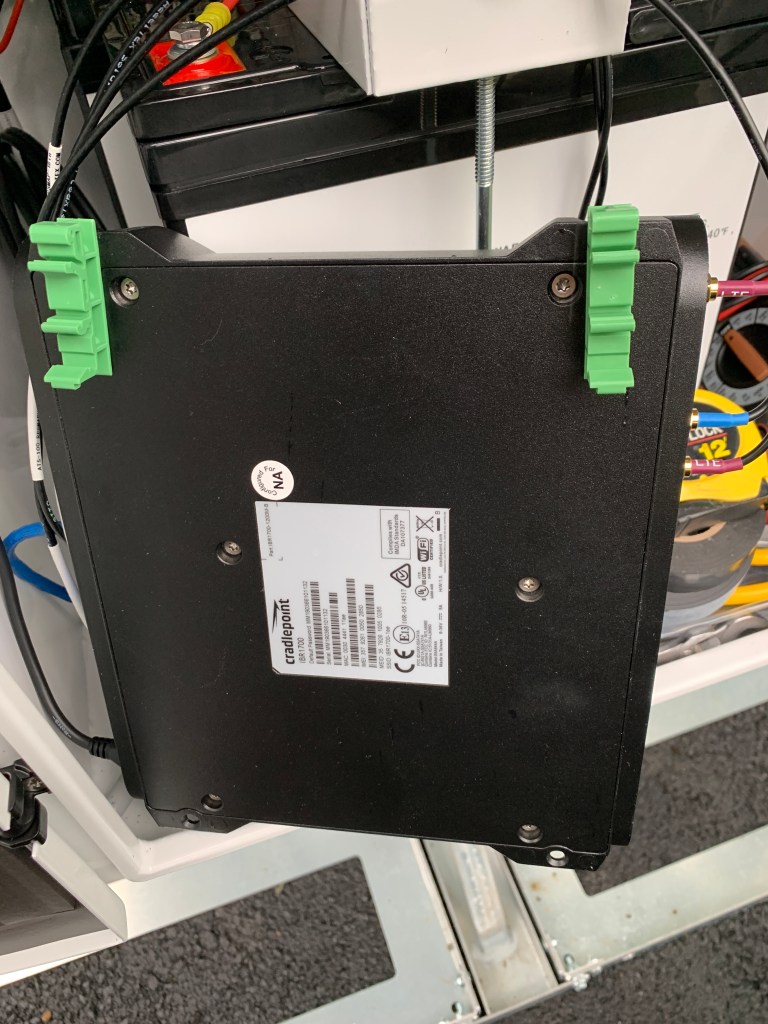
This was another point where I decided to go outside of the installation documentation. I ordered some DIN mounts so that I could mount the Cradlepoint router to the DIN rail, which is provided inside the enclosure.
DIN rail mounts attached to Cradlepoint
I’m a stickler for clean cabling so I took my time to make sure all of the cabling was tidy and not loose within the enclosure. I was able to take the Cradlepoint router pig tail and create a service loop, which I attached to the DIN rail with a zip tie. I also routed the LTE/GPS leads behind the DIN rail so that both the antenna leads and router pigtail would be hidden behind the Cradlepoint router once it was installed.
Cradlepoint pig tail attached to DIN rail. On the back panel you can see the solar panel lead passing through it’s cable gland and connected to the bus bar
To this point, I had done the assembly in my basement. Once the wiring was complete it was time to move everything outside onto my driveway. Even though it was about 50% assembled, it was pretty heavy. If you plan on placing one of these kits in an elevated location, such as a roof, I would suggest hauling the parts up un-assembled. Our team has been doing just that since the remaining kits arrived and it has been working very well. They have been hoisting all of the materials to their permanent locations with the intent to come back at a later time for assembly. So far it is taking almost as long to lift everything to the roofs as it is to assemble the kits.
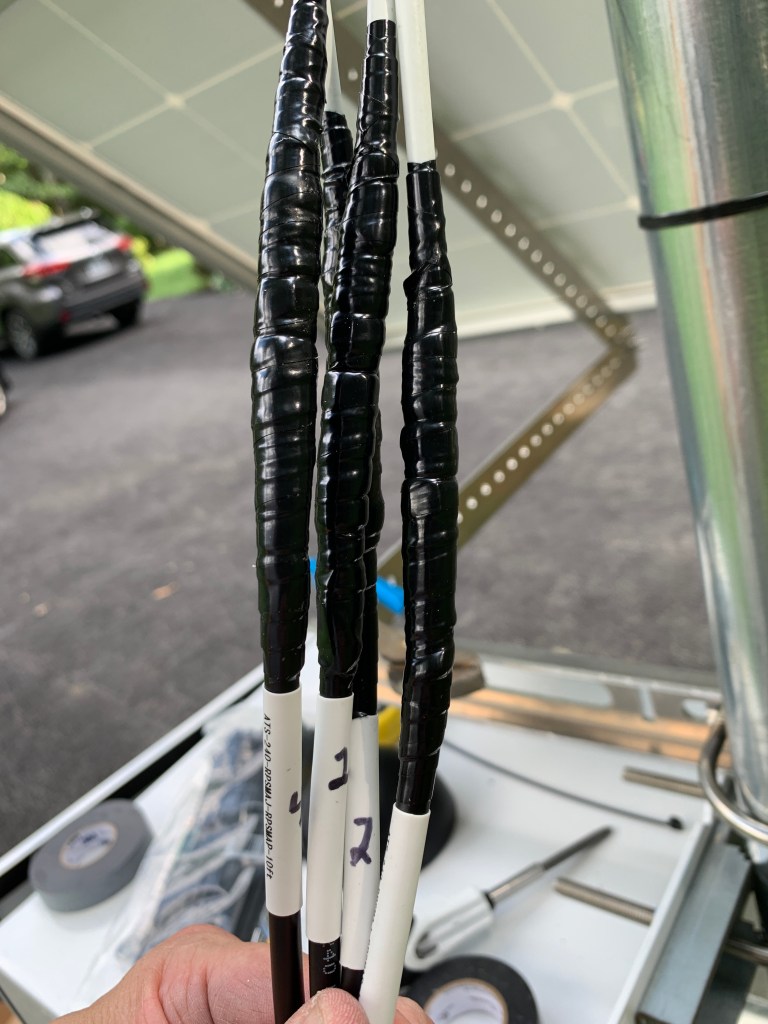
Once I had everything moved outside, there were only a few remaining things to assemble; mainly the solar panel and external wifi antenna. At this point, the most time consuming part of the installation was started. The weatherproofing. Since the mast extends a good distance vertically, cable extension leads were provided in our kits so that the antenna would reach inside the enclosure. I picked up some 3M Temflex and “good” “regular” 3M 700 electrical tape to handle the weather proofing. Once I got the leads unwound and connectors tightened, it took me another 20-30 minutes to properly weatherproof all of the cable leads. Often overlooked, this, in my opinion, is a very important step. This is probably the amateur radio operator in me coming out. After some discussion with my teammates, we decided that weatherproofing the cable assemblies prior to install day would be a timesaver.
3M Temflex followed by 3M 700 electrical tape over the RP-SMA connectors of the antenna leads for weatherproofing
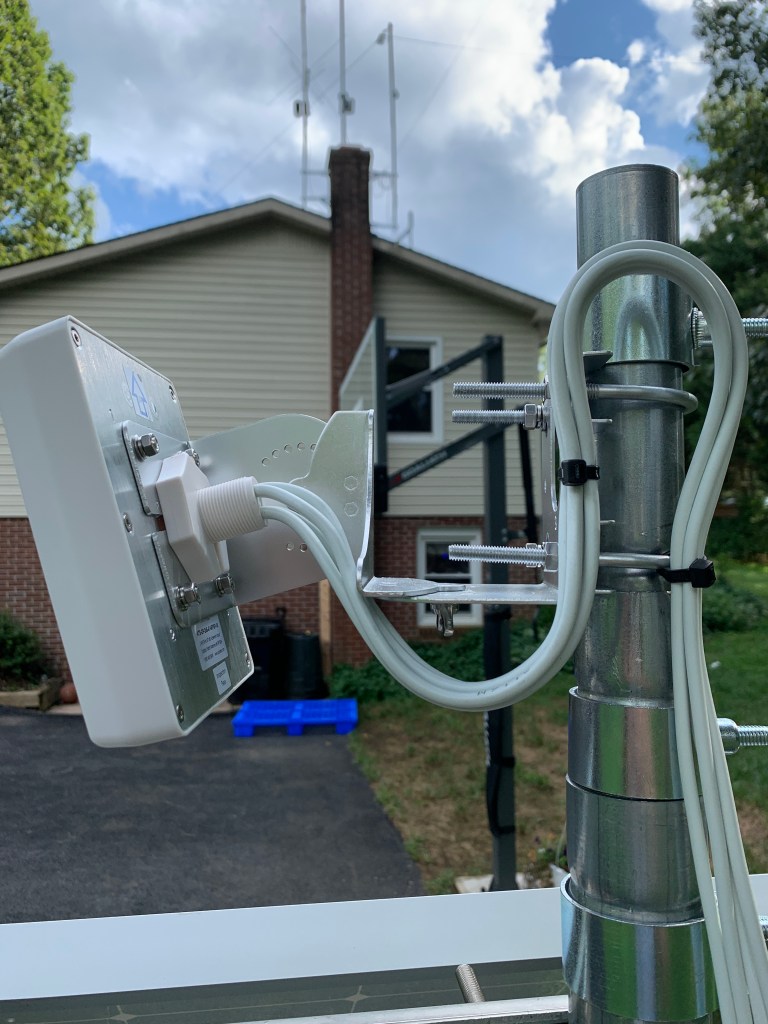
Once the leads were assembled and weatherproofed, I mounted the AccelTex ATS-OP-245-47-4RPSP-36, which we affectionately refer to as the “Everyman’s Antenna” because of it’s versatility. In this case, we chose the four lead RP-SMA Everyman’s because the Cradlepoint IBR1700 has four RP-SMA connectors for the wifi antenna and it met our requirements.
After the antenna was mounted I strapped the leads to the mast with a removable strap, in this case velcro because I didn’t have anything else at the time and I wanted to be able to easily move the mast up or down without having to cut zip ties. I would highly recommend strapping the cables so that they aren’t catching wind and/or rubbing against any metal pieces, which could cause the insulated jacket to fail.
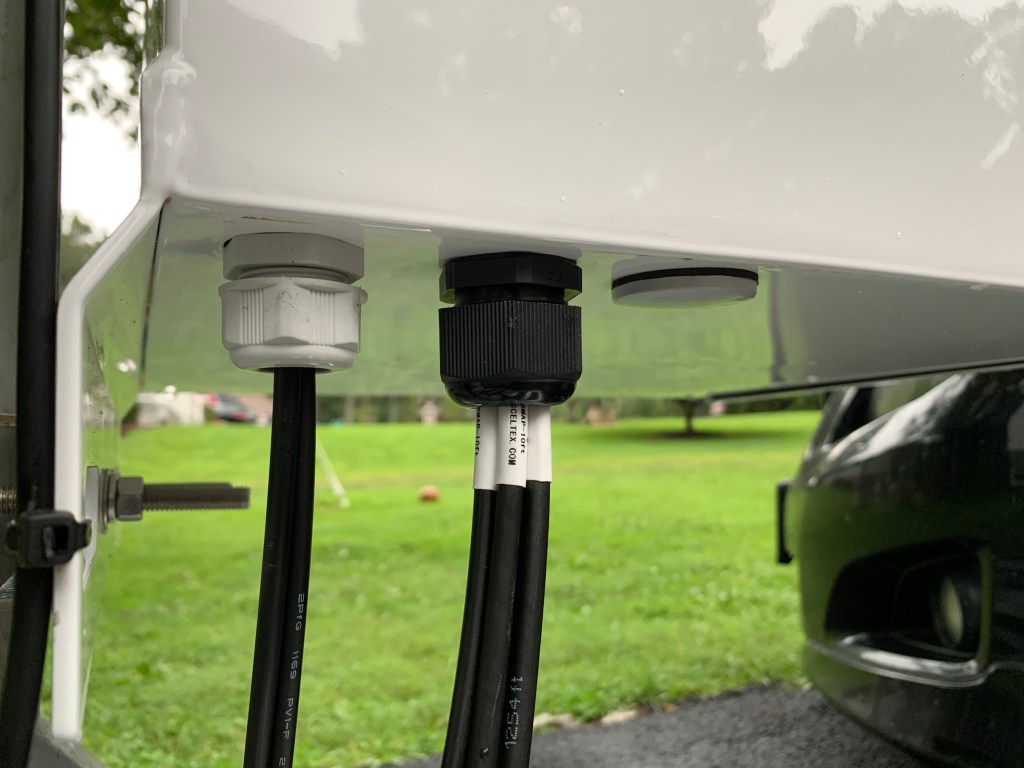
One thing I would potentially recommend to AccelTex would be to include larger cable glands for entry of the antenna leads into the enclosure. The enclosure comes with two cable glands and third blank. One of the cable glands is dedicated for the solar panel wire harness. The four leads that I had for my antenna would not fit through a single cable gland. I have spare cable glands from other projects so I removed the gland that was shipped with the kit and replaced it with a larger M25 gland that accommodated all four leads perfectly. Once I discovered the better fit, I ordered a couple more bags so they could be used in the remaining kits.
Stock cable gland on left. Larger, M25 cable gland on right.
Once I had the antenna leads into the enclosure, I attached smaller, more flexible leads to the existing leads before finally attaching them to the Cradlepoint. I am glad AccelTex includes the smaller diameter leads as it makes for easier cable routing, and an overall nicer install. I tightened these leads to the existing leads but did not weatherproof the connectors because they would remain inside the enclosure. I was able to make sure this would happen by fastening a zip tie around the leads just inside the enclosure. By doing this, the leads could not slip back through the cable gland.
External leads were run through the cable gland and then attached to smaller diameter internal leads. I attached a zip tie so they would not slip back through the cable gland.
Once I had my cabling in order, I attached the LTE/GPS antenna and wifi antenna leads to the Cradlepoint router and attached it to the DIN rail.
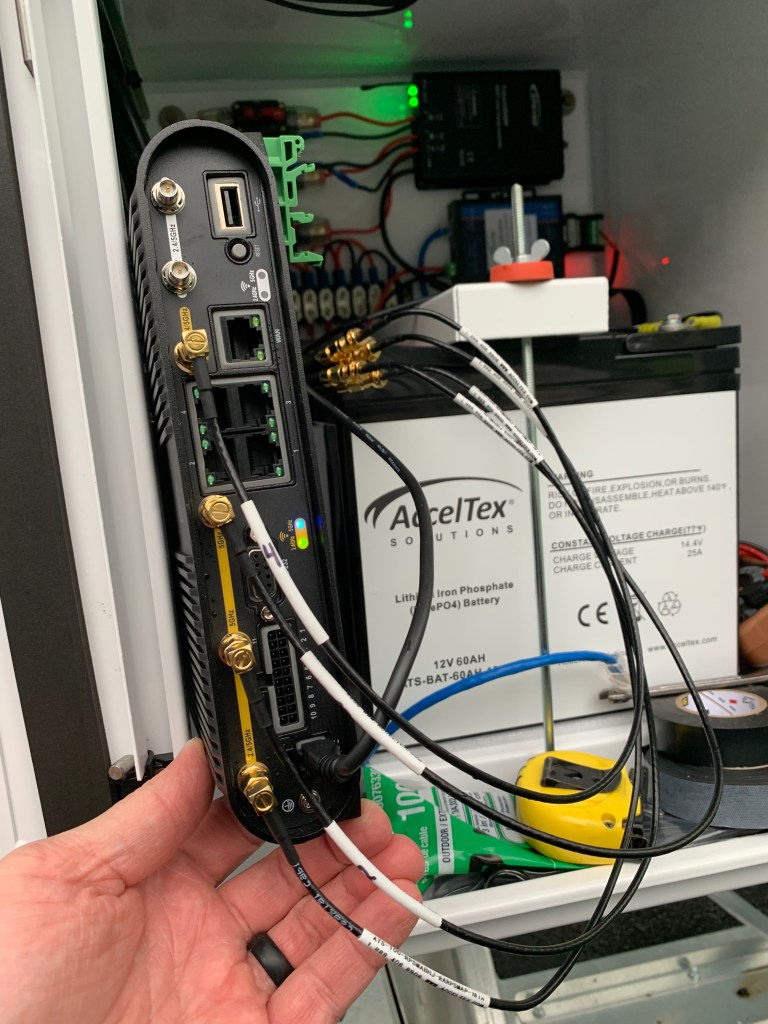
Wifi antenna leads connected to the back of the Cradlepoint router
LTE and GPS antenna leads connected to the Cradlepoint router which is mounted to the DIN rail
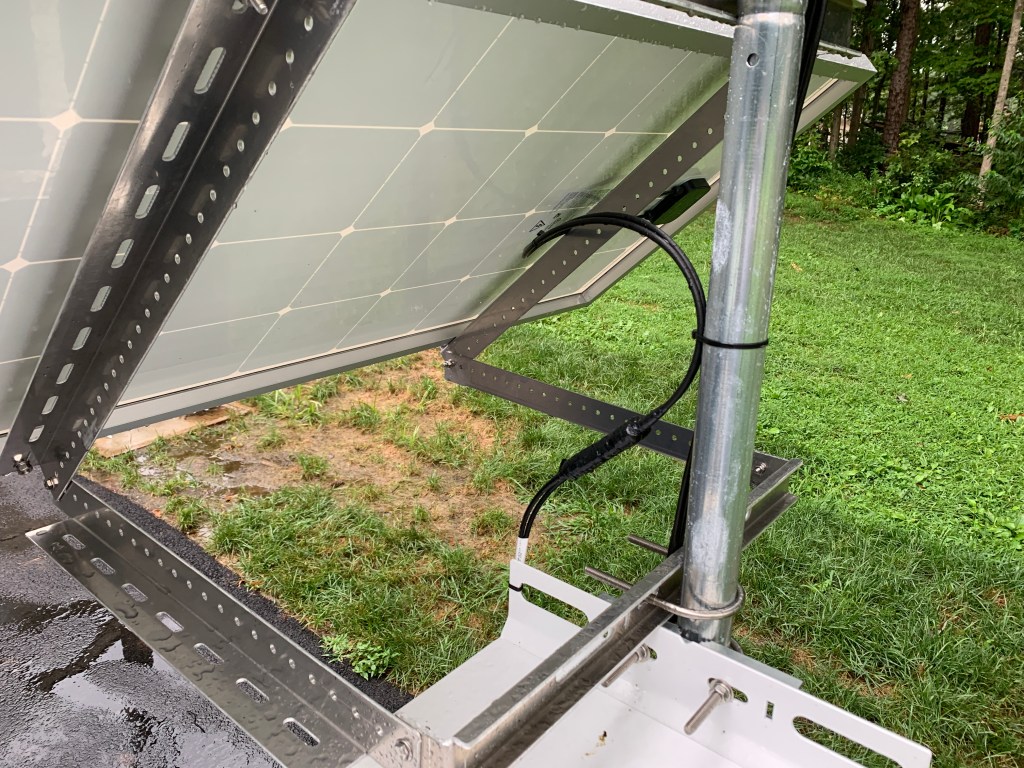
After the router antenna leads were connected, I was mostly done. I had mounted the solar panel earlier, which was relatively straight forward. I tidied up the cables that were on the outside of the enclosure and weatherproofed the solar panel quick connectors that were on the leads. I found out later this was not necessary because the connectors are designed to be weatherproof already.
Weatherproofed solar panel quick connect power leads
Cleaned up cabling
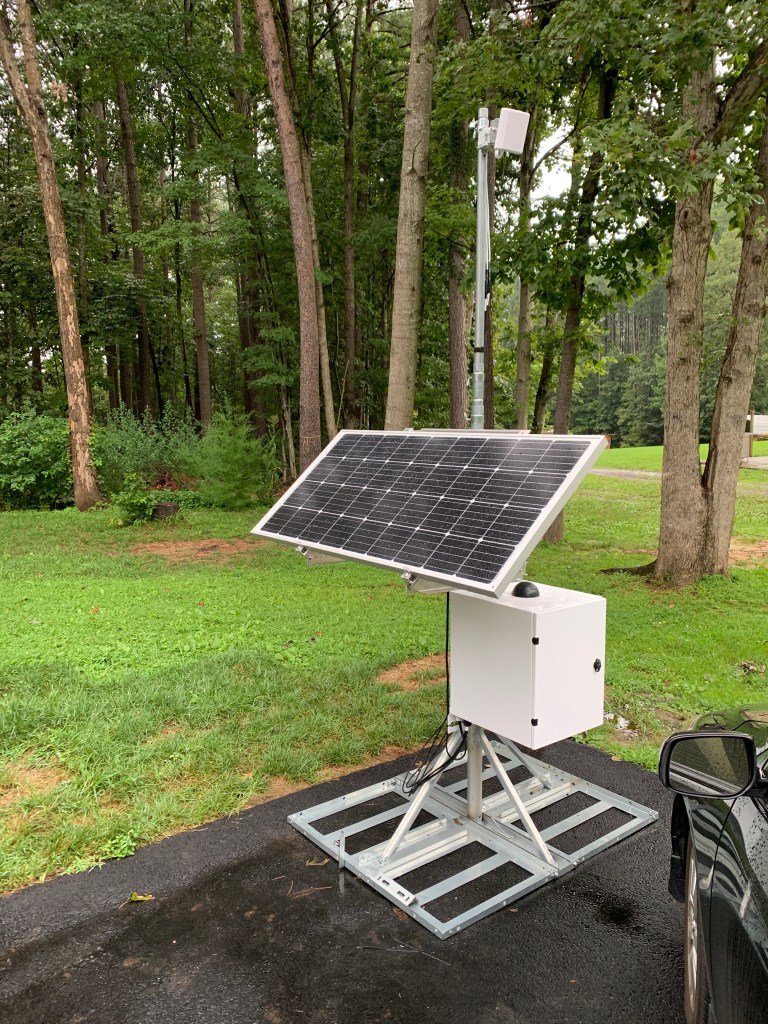
Finished product
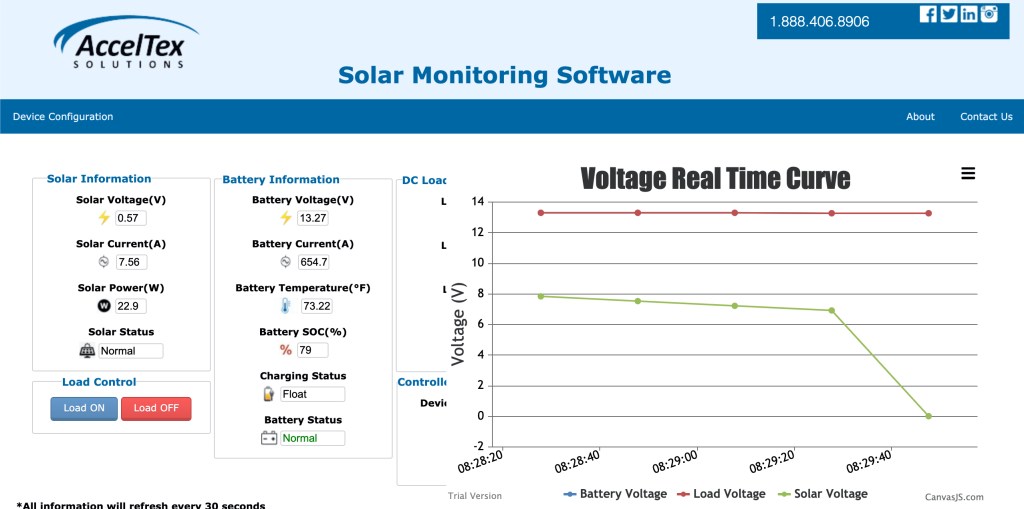
The kit we chose has 160 Ah battery capacity and a 180 W solar panel. We also chose to add on a remote solar monitor so that we could monitor charging and battery conditions at each site. The batteries have been online for almost two weeks, through cloudy days and night time, and have remained online since they were wired up. The battery capacity can be sized to your needs.
Remote solar monitor
Overall, this kit exceeded my expectations. The directions were great, the assembly was straightforward, the parts are high quality, and it looks awesome. Although assembly does require that you have some basic knowledge of wiring and light electrical work, it can be completed by most everyone. Everything went together very well and the first few production units are currently online at their school sites and working well.
In a time with many unknowns and changes that can come at any moment, this kit helped us adapt and get essential network resources outside of our school buildings, reliably, and in a short amount of time. These kits are very versatile and can be placed most anywhere which makes them that much more important right now while school districts are trying to figure out ways to extend their edge outside of their buildings.
As we already know, it is pretty crazy out there right now. I am very blessed and I feel it is somewhat of a responsibility to share knowledge like this right now. If you think this solution could help your rural school district, urban school district, or any other vertical where you need to extend network capabilities during these trying times, please feel free to contact me. I will do what I can to help out and/or try to get you in touch with someone who can. We can get through this if we all work together!
Note – Lighthouse image was used with permission from Ranveig Marie Photography. Check out her stuff here: Instagram, Facebook, and Flickr.
This post will serve as part one of a multipart post concerning recent happenings involving client settings, client behavior, what was done to tune a network, and the results thereafter.
Chromebooks have been around for several years now and love them or hate them, they are here to stay. Chromebooks began as a low cost consumer device but have since crept their way into the enterprise, as well as established a strong foothold in the K12 vertical. What originally seemed like a cheap compute option, is now available in many different hardware options, many times offering “better than decent” performance for an affordable price. Don’t be fooled though, there are plenty of Chromebook devices out there that sport less than desirable performance but rep a very attractive price tag. This initial post explains my desire to get a better understanding of Chromebooks and their behavior on my beloved wireless network.
We currently have tens of thousands of Chromebooks in our Google Domain that are owned and managed by our school district. We recently reached over 80,000 concurrent wireless devices on our network and ChromeOS serves as a sizable percent of that number, steadily creeping towards surpassing iOS. Most of the time everything works great but when there are issues reported, you can bet there is a very good chance the device in question is a Chromebook. Known issues in the past have been cleared up by Google in relatively short order. Other times, issues linger on and off, coming and going like the ebb and flow of an ocean tide. In the recent past our district standardized on a specific manufacturer and model of Chromebook that would be purchased and supported by our department staff. Many people were brought together to make sure the device met and exceeded our expectation for an exceptional user experience. Keep in mind there are several thousand other Chromebook devices still on our network which are either legacy holdover or BYOD devices. Ironically, despite the vast differences, many of the Chromebooks exhibit similar behaviors. This post will go on to explain my thoughts as to why this may be.
To get a better understanding of Chromebook behavior on wireless networks, I decided to collect data on my own. This was done to see if I could correlate behaviors with known issues. I decided to create a simple form on my blog that asked for a few pieces of information easily obtained from a Chromebook with a few commands. The following information is what I was interested in:
Chromebook Full Model Name
ChromeOS Version
WLAN Adapter Model
Roam Threshold
Country
Overall, I was fairly underwhelmed with the response but I did get a handful of responses (thanks to those who contributed). Out of the responses I did receive there was one very interesting thing that stood out. The roaming threshold was EXACTLY the same no matter the manufacturer, ChromeOS version (recent or several years old), or WLAN hardware!
Why would 18 (roaming threshold (SNR)) be the threshold that was selected for ALL variations of Chromebooks? What this means is that if the Chromebook’s Signal to Noise Ratio (the difference between RSSI and noise floor) drops below 18, a roam event could occur because the device deems the signal to be less than optimal. Those of us who have been in the game for awhile know that the inconsistencies in end-point wireless hardware is the consistency. Wireless network hardware is not calibrated by the manufacturer. Wireless network hardware behavior will vary depending on manufacturer, device capabilities, DRIVER VERSION, etc. In fact, two wireless network adapters made by the same manufacturer using the exact same driver, placed in the exact same model device, will behave differently! Why would the very intelligent people at Google think that the same, non-adjustable, roaming threshold was best with so many different variables in play? There may be a good explanation, but so far I have been unable to find it. Other types of devices (ie. Windows) offer the ability to tune roaming behaviors within advanced driver settings. To date, ChromeOS does not allow adjustment to these types of settings.
As mentioned earlier, Chromebooks aren’t going anywhere. They are good devices and fit the K12 environment well due to many factors. As Chromebooks push further out of the consumer realm and into being an enterprise player, Google may need to adjust their one size fits all wireless settings model. The massive difference between home use and enterprise use should drive this change unless there is a good reason not to (I’d love to know, Google!).
Future posts will explain more discoveries and how I was able to tame these K12 beasts, with the understanding that bending a network for a single device type is often dangerous. I like to live dangerously…