I have been a NetBeez fan for several years now. I started my hive with the Raspberry Pi 2 agent and have been using them ever since. Over the last year or so we have upgraded our hive to include the latest and greatest Raspi agent, as well as include KVM and Docker agents hosted within Cisco Catalyst 9300s. The people behind NetBeez are second to none, and their product keeps getting better and better!
I’ve recently had the opportunity to work with the NetBeez folks, as well as some folks from Cisco, on an upcoming webinar where we are going to discuss Cisco’s AppHosting capabilities, combined with Netbeez, on the Catalyst 9k line of switches. Notice I didn’t specifically limit the previous sentence to just the Cat 9300 ;). More to come on that later.
Check out a couple blog posts from Netbeez and Cisco about our upcoming webinar!
We still use the NetBeez hardware agent as our frontline troubleshooting tool when we need to deploy an agent remotely and monitor “network issues.” We are all familiar with those times when we get reports of “network issues” just to find out when we get onsite to troubleshoot, that “the issue went away.” We use the hardware agent a little differently than most. We will leave the hardware agent behind to collect and relay data back to our dashboard so that if the issue returns, we can see the problem first hand, from the client perspective.
Over the last year or so, with the addition of virtual Netbeez agents, we have been able to change the game of monitoring the network. Being able to leverage existing switching infrastructure, specifically the Cisco Catalyst 9300, we are able to deploy Netbeez agents “inside” equipment we already own using Cisco’s AppHosting capabilities!
Combining the power house Cisco Catalyst 9k line of switching with the capabilities of Netbeez has been very rewarding in many ways. Join NetBeez, Cisco, and me on September 10 at 1PM EST to see how we are changing the way we troubleshoot and gather information from the network in dynamic times!
There are many good things continuing to happen with everyone’s favorite wifi troubleshooting tool from Netscout. The AirCheck G2 will have new firmware released this coming week on Tuesday, October 23. These new features expand on the tool’s already great feature set and should have any engineer feeling even more confident while troubleshooting.
Version 3 is bringing many new features to your AirCheck. Upgrading the AirCheck G2 becomes easier to upgrade with over the air firmware upgrades. The only requirement to take advantage of this new feature is to have a current support contract. This is a great time saving new feature.
Another feature new to the Aircheck will be the ability to share your profiles with other AirChecks within your organization. A profile can now be easily uploaded to Link-Live and shared among other AirChecks under your control.
Adding to Link-Live’s new versatility is the ability to upload full AutoTest and Connectivity results, session files, screenshots, and packet captures. I pulled a packet capture for my iPhone after recently upgrading and saw the new option to upload to Link-Live. I simply selected the Link-Live feature, logged into Link-Live and found my pcap ready for analyzing. This builds on the ability to quickly transfer a pcap to a USB drive which can be connected directly to the AirCheck.
Enhanced AP naming support has been added to get a better idea of which AP you are currently working with. APs from Cisco, Aruba, Huawei, Aerohive, and Extreme Networks are currently supported. Hopefully Fortinet will be added soon. I still rely heavily on my AirCheck G1 for identifying Meru/Fortinet APs due to it’s ability to read the AP ID information element. I continue to patiently wait…
Improved packet captures allow the user to start and stop the packet capture on a specific device or channel. As mentioned previously, you can also now upload your packet capture to Link-Live for easy sharing of data with others in your organization.
Another major enhancement is the ability to transfer certificates directly to the AirCheck using a USB device. I know this was a request in the past and the good people at Netscout listen to their customers!
By now many of you may know that Netscout sold their “tools” to StoneCalibre, a private equity firm, on September 14. Netscout presented their future plans for the AirCheck and LinkRunner at Mobility Field Day 3 on the same day that the deal occurred but the formal announcement wasn’t made until the following Monday, September 17. Netscout was clearly aware of what was going to happen but still had a detailed roadmap for their products going forward. Their confidence seemed to be at an all time high and didn’t appear there was any reason for concern. I am still very confident in the product line going forward and am excited to see where this deal takes them.
If you have a current support contract with Netscout, get ready to download the new firmware this coming Tuesday, October 23. There are many more features included that I didn’t mention in this post that will enhance the usability of an already great product.
What I am about to write about is nothing new. Some of my wifi peers have written about Chanalyzer and Cisco CleanAir or various aspects of each or both before. I am going to take you through my journey to get a lightweight Cisco 3502i converted back to autonomous code and connected to MetaGeek’s Chanalyzer.
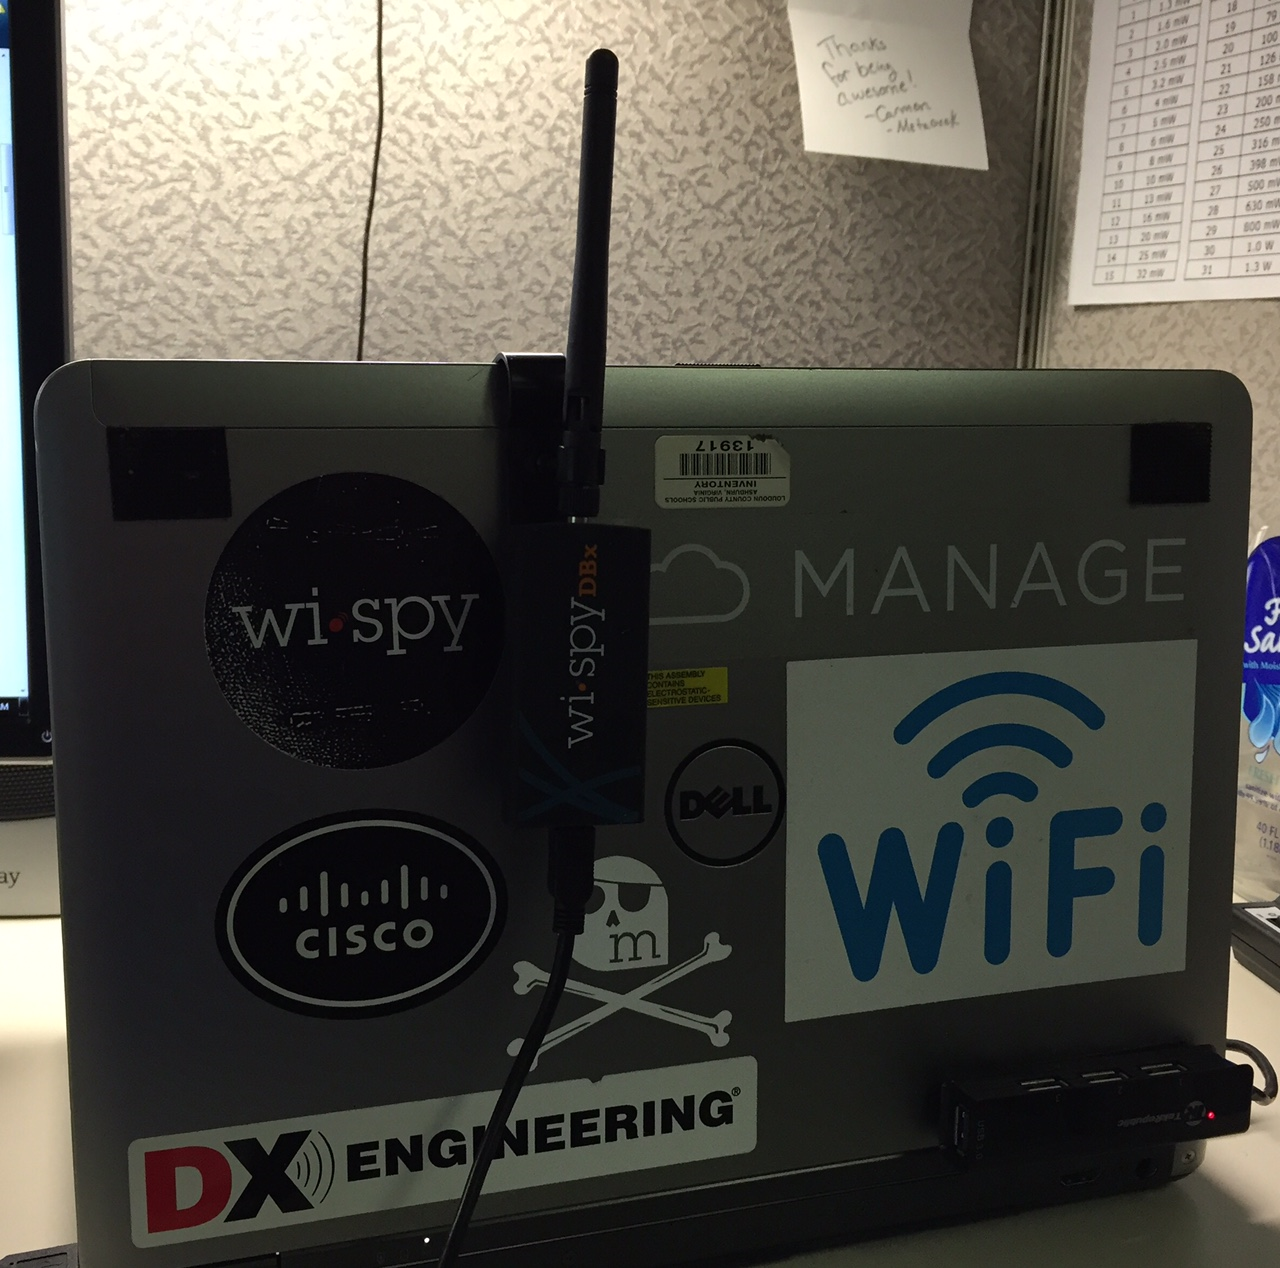
I suppose I should fill you on what my intent is with this project so you don’t have to wonder why I am going about it the way that I am. I currently use MetaGeek’s Wi-Spy DBx with Chanalyzer on a regular basis and it does everything I need it to do. When I found out I could get an even higher resolution layer 1 view with a Cisco AP that supports CleanAir, I had to give it a try. This was done with no other reason than “just because.”
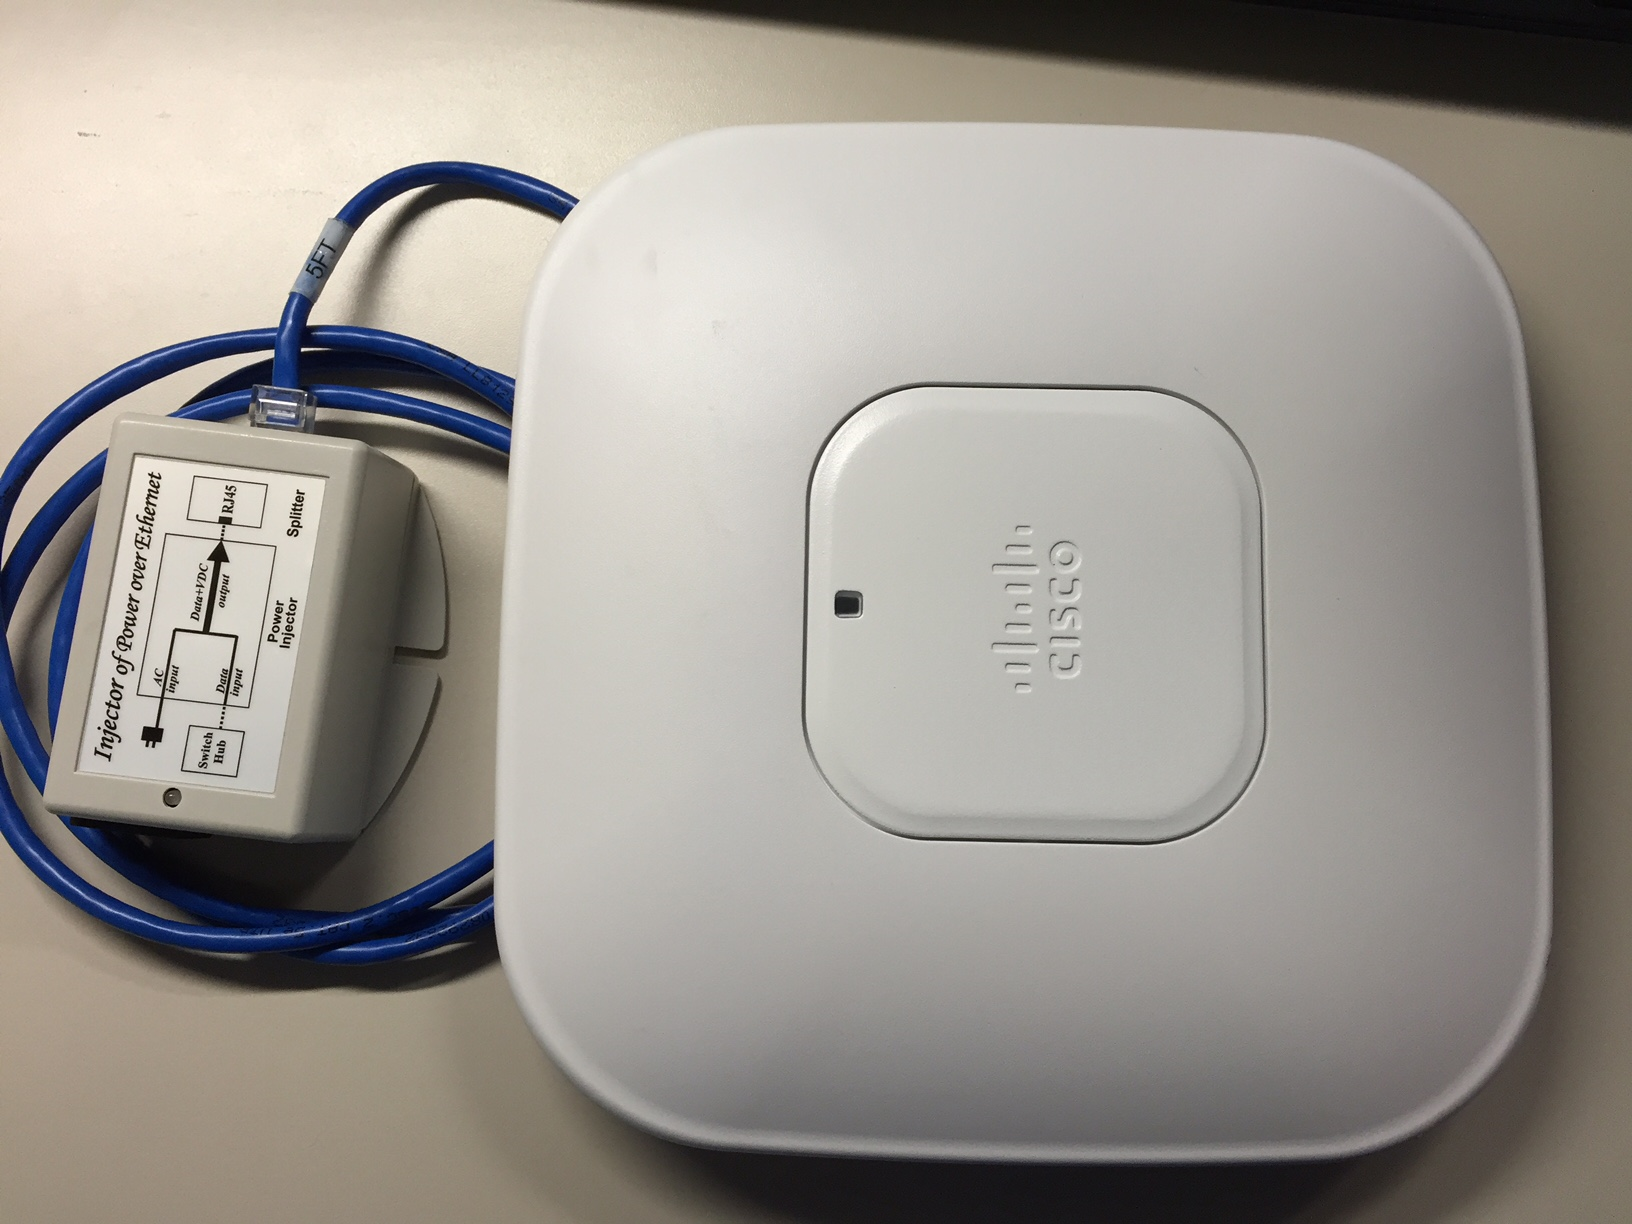
Cisco 3502i with CleanAir
You might say that the DBx is my “go to” tool when I first arrive onsite to check out an issue. I love MetaGeek because their products are excellent and their staff are top notch. Whether you are working with inSSIDer, EyePA, or Chanalyzer, you are always dealing with quality. If you ever need help with any of them my buddy Joel Crane is ALWAYS there to help.
My work laptop with Wi-Spy DBx
The first part of the project began with talking to Sam Clements. He is my go to guy when it comes to Cisco wifi. He gave me some pointers and even hooked me up with ANOTHER 3502i for this project. Sam had previously hooked me up with two other 3502i APs because he felt bad for me and my single 1131 connected to my Cisco WLC 2504. When the 3502i arrived I put Sam’s advice into action. I connected the lightweight 3502i to my WLC 2504 to get it’s code upgraded to 8.2.100.0. Upon completion I took my nice fresh copy of autonomous AP code (ap3g1-k9w7-tar.153-3) and loaded it to the 3502i. I SSH’ed into the WLC and issued the following command:
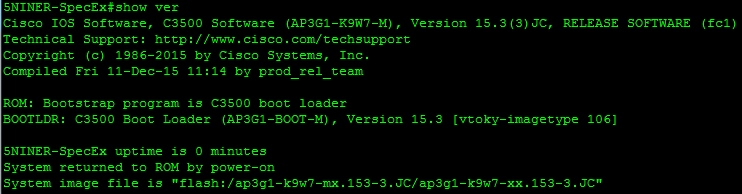
Where [IP] is your TFTP server IP and [AP_NAME] is the name of the AP in the WLCThe process took a few minutes and the AP rebooted a couple of times. Everything is straight forward at this point and you can watch the progress of the “downgrade” via your console output if you have consoled into the AP. Once the process is complete you will recognize that the AP has good ol’ IOS running on it.
CLI output of ‘show version’ on autonomous AP 3502i
At this point most of the heavy lifting has been done. At the advice of Sam, I configured the BVI with an IP address and created a DHCP pool. This was done to allow for easy connection to the AP via Ethernet cable and POE injector directly from my laptop.
Configuring BVI1 with an IP address
Configuring DHCP pool
For my particular application I chose to use a POE injector to power my AP. I do not have a survey rig battery and I needed something a little more portable. If you do have a survey rig battery you should check out this blog post from Nolan Herring: https://nolanwifi.com/2016/04/22/spectrum-box/. He has built something called a Spectrum Box, also with the help of Sam (that Sam guy is all over the place).
Now that you have connectivity between your laptop and AP you have to tell the radios in the 3502i that they need to be evaluating the spectrum and not serving up wifi. This mode is also known as SE-Connect mode.
Configuring the 2.4 GHz radio for spectrum analysis
Configuring the 5 GHz radio for spectrum analysis
The AP is now fully configured for use with Chanalyzer. At this point I was super excited but I was soon met with disappointment. I had failed to realize previously that connecting to a CleanAir AP with Chanalyzer was an additional feature that would require a purchase. I quickly got in touch with Joel at MetaGeek and let him know of my predicament. He graciously provided me with a key enabling the CleanAir feature so that I could continue my project. A big thank you goes out to Joel and MetaGeek for providing me with this feature so that my project did not come to a screeching halt.
We are now at the point where we can open our trusty ol’ Chanalyzer. This is where everything that us DBx folk are used to, will change. Once you have Chanalyzer open you will notice there is a menu named CleanAir (as long as you have purchased this feature). When you click on CleanAir it will prompt you with some options. If this is your first time connecting to a CleanAir AP you should select “Connect to a CleanAir AP.” You will then be prompted with a box that looks like this:
Connect to CleanAir AP box
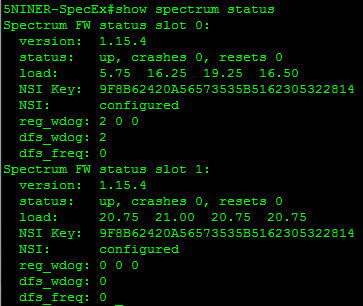
Enter the AP’s IP address (in my case it is the default gateway given to me by the DHCP services on the AP), enter the NSI key, and enter a friendly name. You might be asking yourself what an NSI key is, much like I was. It is a unique code that is used like a password so that Chanalyzer can connect to a CleanAir AP. You can get the NSI key from the AP by issuing the following command from the CLI:
CLI output of ‘show spectrum status’
You’re In!!! At this point you are ready to check out the detail that the Cognio chipset has to offer inside of a Cisco CleanAir AP!
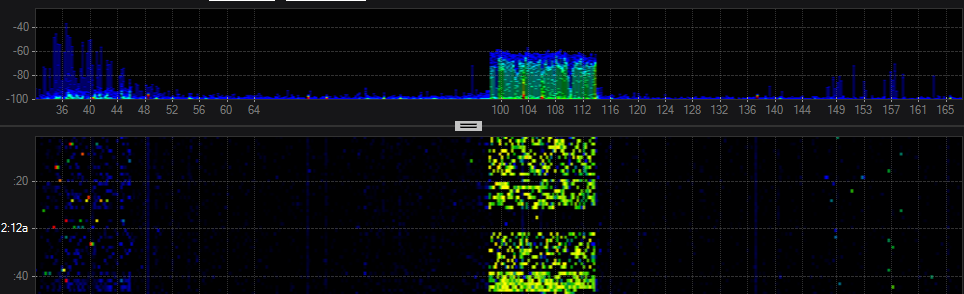
Chanalyzer with DBx
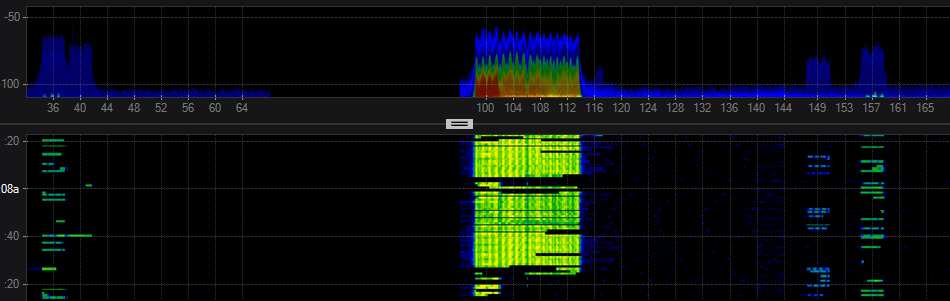
Chanalyzer with CleanAir AP
As you can see the resolution of the Cisco CleanAir AP with the Cognio chipset is very clear. Each mode definitely serves it’s purpose though. The DBx will still be my go to tool in the field but the clarity of the CleanAir AP is hard to beat. If you already have CleanAir APs in service this could be a much more practical remote monitoring solution for you. It should be noted that there are several other use cases\situations that this could be deployed for.
If you don’t have the CleanAir capability with Chanalyzer and you currently have Cisco CleanAir APs, do yourself a favor and visit MetaGeek’s website and purchase the accessory. You definitely won’t be disappointed!
Here is a few blog posts that I read through while completing the project: